10 Parts of a Hammer: Diagrammed to Understand
Author: Chris Miller | Editor: Omar Alonso
Review & Research: Jen Worst & Chris Miller
When it comes to hand tools for fixing things, there is one item that comes to mind: a hammer. It's a versatile and seemingly simple tool that can be used for shaping metal, driving nails on wooden boards, and whatnot. But there are many parts of a hammer that come together to form this tool.
You've probably seen the use of a hammer in movies and wondered what type of hammers they are using. Well, there are many types of hammers, and every one of them is crafted with several components. If you know the parts of a hammer and what they are meant to do, then it's going to be easier for you to pick the right one.
For as strong as it is, a hammer can deteriorate, and if you are familiar with the different sections in the anatomy of a hammer, you can have it fixed in no time. This article is dedicated to highlighting every part of a hammer tool. Without delay, let's get into it.
Diagram of a Hammer Anatomy
As a faster visual aid, we've produced the diagram below to help you associate the hammer part names with the actual hammer parts.
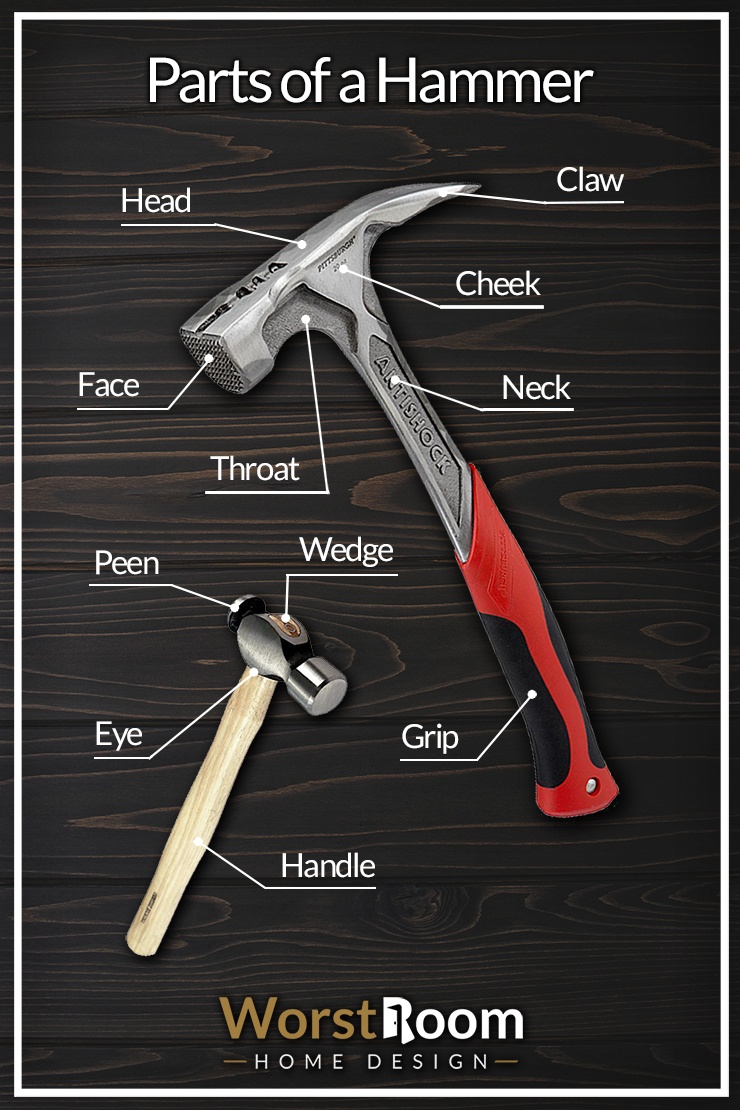
The hammer parts diagram above shows you the entire anatomy of a hammer in one look. It's not an extremely complex contraption but knowing the names of the parts and being able to identify them will help you when communicating with other tool users.
Parts of a Hammer Explained
You probably notice a hammer by its head and handle design. These two are the basic structure of a hammer body, but there is more to it that adds to its functionality. Let's check out.
Handle
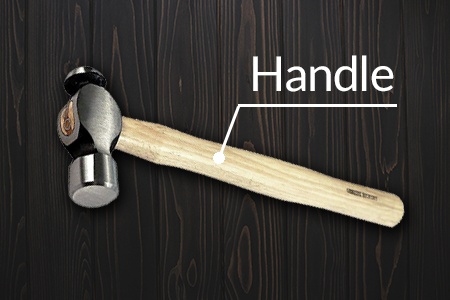
Without a handle, a hammer won't exist. It is a crucial part of the frame and will support the head and all other components. Not to mention this is where you grip your palm to get hold of it.
When buying a hammer, people first look at the handle and experiment with how it feels. Some handles are plain wood, and some will have paddings such as grip for better handling. The weight, diameter, and length of a hammer handle will vary.
You would want to get something that fits well in your hands, rather than something too heavy or long. You'll also want to consider the jobs you're doing and how much shock absorption you may need. The grip can only absorb so much shock for you.
A wood handle is cheapest but won't last forever. A steel handle is the most durable but offers no shock absorption. A fiberglass handle is durable enough and offers the best shock absorption.
Grip
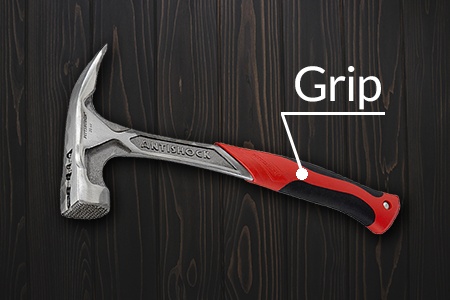
Anything that wraps around the handle is the grip material. Not all hammers come with grip fitting, but the advanced ones do. Grips are made with protective rubber padding that allows you to hold the handle comfortably.
Not to mention it improves the handling ability. Gripping the surface on a hammer will make sure the weight doesn't slip off your hand that easily. Like we said, not every hammer has a grip.
If your hammer doesn't have one, but you still want a better gripping tool, you can customize rubber materials for the handles. A decent grip will help absorb some of the shock from pounding away with the hammer, but that is not its main purpose.
Head
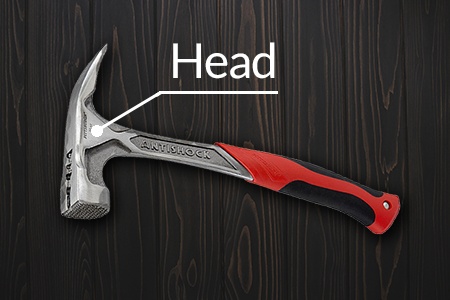
A hammer is made for pounding on different surfaces, and the most obvious parts of a hammer that does it are collectively known as the head. It is one of the primary segments of a hammer, apart from the handle. It is the integral area that does all the pounding. It has a superior weight and will vary on different types of hammers.
The size and material of the head will differ on each variation of the hammer, whether it is meant to pound on wood or to hit stone objects. A typical hammer head is made with heat-treated steel for superior hardness.
Face
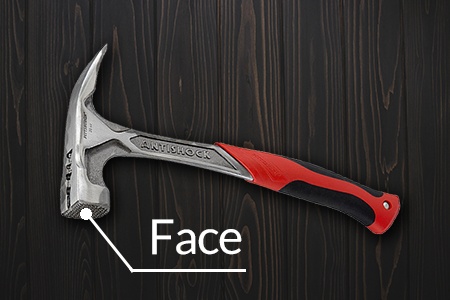
When you strike a hammer, the head has a specific surface that comes in contact with the thing you are hitting; that part is the face. You can consider this part of the hammer head assembly.
It is a flat surface on the end of the head which comes in varying diameters, depending on the hammer type. It will either have a smooth face or a milled face to aid in gripping to keep the hammer from slipping off the face it is striking. Sometimes a milled face is called a waffle-face, which can help grip the heads of whatever types of nails you're working with.
A claw hammer is known to have a medium face. A tack hammer has a smaller diameter, whereas sledge hammers will have a face with a bigger surface area. The bigger the face, the larger the impact area and the easier it is to strike true.
Now you can smash a tough object with a small face hammer, but that will depend on your brute force. Get something that works for you.
Neck
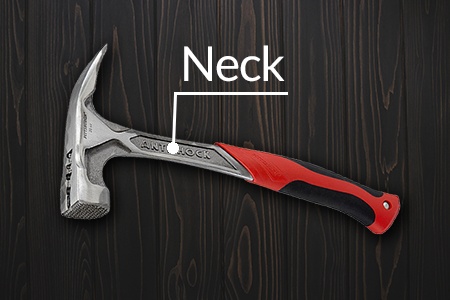
Just like a human neck connects the head to the body, a hammer neck does the same. It affixes both the head and the handle in place. The neck is the portion between the face and the head.
The size and shape of necks vary depending on the hammer. Not all hammers will have a neck; for example, hammers that are used with brute force to break rocks or bend metal won't have one. On the other hand, woodworking hammers will likely have a neck to allow precise pounding on particular areas such as nail heads.
Throat
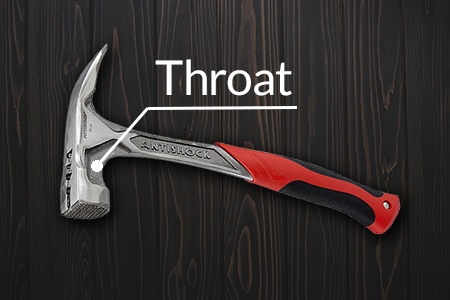
A throat is a section that connects the neck on the head to the frontal face. Similar to the neck, they are not present in most heavy-duty hammers. Bigger items like sledgehammers lack a throat and don't require one.
In comparison, an electrician's hammer comes with a long throat. These long parts of a hammer are used to reach critical areas, so the long throat helps with the cause.
One interesting aspect of a hammer throat is that there can be a magnetic notch set into it designed to grasp nails for you. When a nail is set into this notch, which is always on top of the face, throat, and head, you can drive a nail with one strong swing instead of needing to balance it with your fingers, risking injury.
Cheek
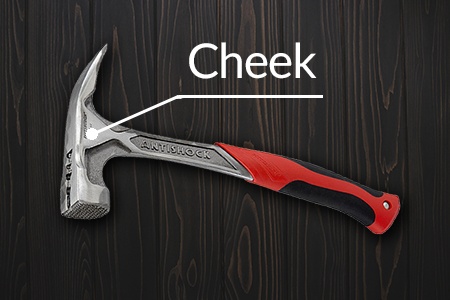
No matter what type of hammer you are using, it is made to have cheeks on both sides. They are the horizontal planes of the hammerhead that come in different sizes depending on the hammer type.
Are these parts of a hammer necessary addition? Well, the cheek end is not something that is constantly in use, but when necessary, it can be utilized to flatten different surfaces.
Eye
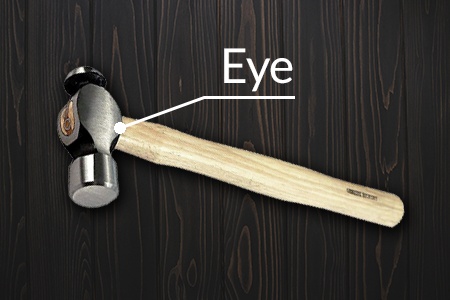
At the bottom of the handle, there is a hole that accommodates the handle. This hole is known as the eye of a hammer. The eye hole is where the handle is inserted. When searching for the eye, you might not find one on some hammers.
More accurately, hammers that are made with steel don't have an eye because the handle and the head are forged in one piece. Whereas on wooden hammers, you will certainly see the eye.
Wedge
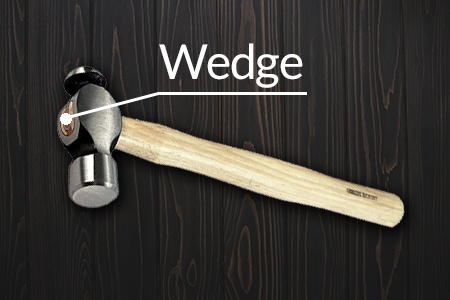
You won't find a wedge in a one-piece steel hammer, but you will most definitely find these hammer parts in wooden hammers and sometimes in fiberglass options, but especially in most wooden types of tools you swing, like axes as an example. The wedge is a shim that is hammered into the hammer at the top where the neck slips into the eye of the hammer.
In order to keep the neck tightly pushing outwards onto the inside surface of the head, inside the eye, you have to drive a wedge into the wood to increase the pressure by separating the wood. This splits the wood but crams it all in so much more tightly that it secures the head in place.
With wooden hammers, this will most likely be the part that causes you to ultimately have to purchase a new hammer. You can only add so many more wedges over time as the head becomes loose before you run out of space, or chunks of wood start falling out.
Claw / Peen
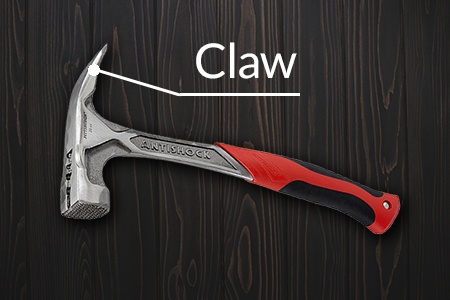
The name says it all. This is the most recognizable part of a hammer head. Claws are for pulling external bits located in the head's rear end. When it comes to the removal of nails, claws can be a match-winner. On hammers, a claw can be either straight or curved, depending on the hammer type.
For heavy-duty work, you would want to get a hammer that has straight claws. They are more effective in removing tougher and larger nails. Straight claws can also be used to rip off timber wood.
For smaller projects that require precision, you can use a curved claw hammer. They are well suited to tackle small nails and can be handy.
Some hammers will feature a ball peen or a cross peen on the back instead of a claw. It's not that common in the present but it should be mentioned. These are meant to provide you with sledgehammer functionality but for more precision work during metalworking and blacksmithing. So what is the back of a hammer called? A claw or a peen are the two options.
The Parts of a Hammer You Should Be Familiar With
The next time you go on to purchase a hammer, we hope you won't have any issues nitpicking parts of a hammer. Knowing every terminology of the components on a hammer will serve you in the long run. Who knew hammer anatomy could be useful?
For example, if you know the purpose of a face on a hammer and how the surface area of it aids the work, you can pick your preferred hammer without any help. A bigger surface area on the face means you will be pounding with great force on a fairly big target. This is done mostly with sledgehammers.
Also, if you end up with a hammer with no throat, then you better realize that it is meant for more intricate work than heavy hitting. The list goes on. Hence, if you are into handy tools, this write-up on the parts of a hammer will further amplify your knowledge.
You'll Also Enjoy:
- 12 Types of Digging Tools to Aid in Your Garden Tasks
- 20 Types of Drills to Bore the Perfect Hole for Your Project
- 12 Types of Sanders to Prepare Your Surfaces Perfectly
- 21 Types of Axes: the Right Tool for Every Task & Situation
- 24 Types of Chisels to Have on Hand & Fill Out Your Collection
Author: Chris Miller
 Chris has over a decade of experience in the lawn care and maintenance industry. His intricate understanding of the procedures and tools required knows no bounds. Chris serves as reviewer and researcher for our editorial team and as an author in his areas of expertise. Learn more on Chris's author page and all about Worst Room here.


