Waterproofing Plywood: How to Seal it With 5 Methods
Author: Omar Alonso | Editor: Omar Alonso
Review & Research: Jen Worst & Chris Miller
Plywood is a versatile construction material, but moisture can quickly degrade its resilience, leading to rot and warping. Did you know applying a waterproof finish can significantly improve plywood's durability and lifespan? Waterproofing plywood is a great move for any exposed to the elements.
This article offers step-by-step guidance on how to waterproof plywood effectively, tailored for beginners and seasoned DIY enthusiasts.
Why Should You Waterproof Plywood?
Waterproofing plywood is essential to prevent warping, wood rot, and extend lifespan. This is as convenient as settling for plywood alternatives you didn't want in the first place that may be more expensive.
Prevents Warping
The integrity of any types of plywood can be compromised over time due to water exposure. Water can seep into the layers of wood, causing it to expand and eventually warp. Warped plywood loses its original shape, compromising aesthetics and affecting the structural strength of whatever you're building or repairing.
The benefit of waterproofing is that it effectively prevents this deformation from occurring. It does so by creating a barrier that stops water infiltration. This protective layer ensures your plywood maintains its form and function for years, irrespective of moisture conditions.
Prevents Wood Rot
Waterproofing plywood effectively serves as a barrier against the dreaded wood rot. This condition is caused by fungi that thrive in damp, moist environments and can severely undermine the structural integrity of your plywood over time.
Through waterproofing methods such as applying waterproof paint or layers of polyurethane, you seal off the surface from any moisture absorption. This process ensures no pathogens enter your plywood to cause damaging rot.
The advantage here doubles! Not only does this prevent monumental damage to structures built with this material, but it also conserves the wood's aesthetic appeal. While learning how to make plywood waterproof might seem like an extra chore, it's well worth it in terms of long-term benefits.
Prolongs Wood's Lifespan
Waterproofing plywood significantly extends its lifespan, offering a cost-effective solution to prevent premature deterioration. Plywood without any protective treatment succumbs more quickly to the harsh weather elements and continuous exposure to moisture - factors that can drastically reduce its service life.
Waterproofing methods such as applying a polyurethane coating or epoxy sealant create a barrier against these damaging conditions. This process not only prolongs the durability of the wood but also enhances its resistance to outdoor use.
Hence, learning how to waterproof plywood effectively becomes an invaluable skill for maintaining and preserving your wooden structures longer-term.
Different Methods of Waterproofing Plywood
Now let's look at how to seal plywood. There are various effective methods for waterproofing plywood, including;
Using Waterproof Paint
Waterproof paint is a popular and effective method for protecting plywood from water damage. It creates a barrier on the surface of the wood that prevents moisture from seeping in and causing warping, rot, or other forms of deterioration.
This type of paint is quick and easy to apply, making it ideal for DIY projects. Before applying waterproof paint, it's crucial to prepare the plywood by cleaning off any dust or debris and lightly sanding it with 180-grit sandpaper.
This helps ensure proper adhesion and a smooth finish. With waterproof paint, you can confidently use your plywood outdoors without worrying about water-related issues like swelling or mold growth.
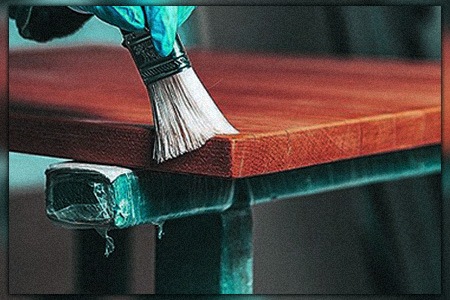
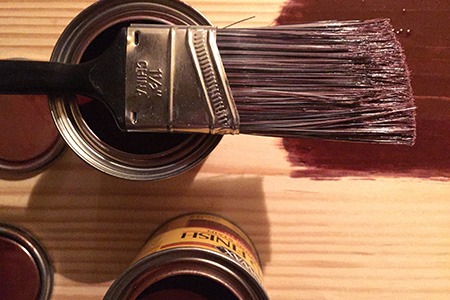
Applying Polyurethane
Polyurethane forms a protective barrier that prevents water from seeping into the wood, protecting it from warping and rot. You can paint over polyurethane too, though you should poly over paint, really, if you have the option.
To apply polyurethane, lightly sand the plywood with 100 to 180 grit sandpaper to create a smooth surface. Remove any sawdust before proceeding. Then, using a brush or roller, apply an even coat of polyurethane to all sides of the plywood, paying particular attention to the edges where moisture can easily penetrate.
Allow each coat to dry for about an hour before applying additional coats as needed. Polyurethane varnish provides long-lasting protection and can extend the lifespan of your plywood by 5-10 years.
Using Epoxy Sealant
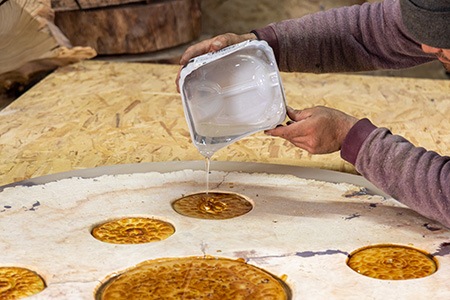
Epoxy sealant is a versatile and practical option in paint or spray forms. Before applying the epoxy sealer, lightly sand the plywood to ensure proper adhesion.
Applying epoxy's thick and fast-drying nature requires some skill as a waterproof coating. However, it creates a durable barrier that protects the plywood from moisture damage once applied correctly.
Contractors often choose epoxy sealer because of its effectiveness in sealing plywood surfaces, making it an excellent choice for indoor and outdoor projects.
Using Plastic Sheeting
Plastic sheeting can be easily applied by stapling or tacking it onto the surface of the plywood, providing a protective barrier against moisture.
This type of waterproofing is commonly used and recommended for ensuring the longevity of your plywood. Plastic sheeting acts as a shield, preventing water from seeping into the wood and causing damage such as warping or rotting.
By creating this waterproof layer, you can confidently use your plywood in various settings, both indoors and outdoors, without worrying about its exposure to water or humidity.
Applying a Drying Oil
This method helps seal the wood and maintains some of its natural flexibility and moisture. Drying oils, such as linseed or tung oil, penetrate deep into the plywood fibers, creating a protective barrier against water damage.
These oils are especially suitable for outdoor use due to their superior resistance to harsh weather conditions. Additionally, applying a drying oil can enhance the appearance of the plywood while providing long-lasting protection against moisture infiltration.
Steps to Waterproofing Plywood
To waterproof plywood, start by thoroughly cleaning the surface and filling any holes or knots with wood filler. Then, sand down the edges to create a smooth finish. Optional priming or staining can be applied before applying your chosen waterproofing method such as waterproof paint, polyurethane, epoxy sealant, plastic sheeting, or drying oil.
Cleaning Off Plywood
This involves cleaning off any dirt, dust, or debris that may have accumulated on the plywood sheet. A quick brush over the surface with a dry cloth can do wonders in removing loose particles.
Additionally, using coarse-grit sandpaper can tackle visible stains and imperfections on the plywood surface. By ensuring the plywood is free from any contaminants, you create a smooth and pristine base for applying your chosen waterproofing solution.
Remember, proper cleaning is an essential step in preparing plywood for long-lasting protection against moisture damage.
Applying Wood Filler to Holes & Knots
To ensure the waterproofing of plywood, it is crucial to apply wood filler to any holes and knots present on the surface. These imperfections can allow water to seep in and compromise the integrity of the wood.
By filling them with a suitable wood filler, you create a smooth and even surface that will help prevent moisture penetration. This step is essential because it not only strengthens the plywood but also improves its appearance by eliminating visible blemishes.
Whether you're working on an outdoor project like boat construction or simply want to protect your plywood furniture from water damage, applying wood filler is a necessary part of the process.
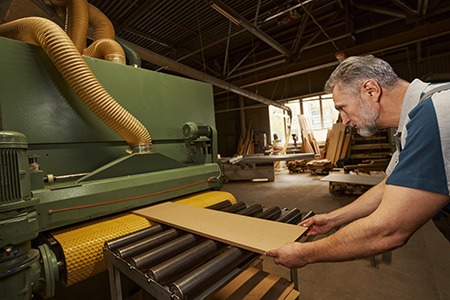
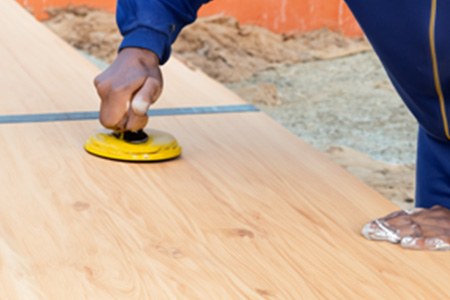
Sanding Down the Plywood Edges
By using 100 to 180 grit sandpaper, you can create a smooth surface for the waterproofing materials to adhere to. You'll want to use the aid of a some power types of sanders rather than trying to sand that much surface area by hand.
This process removes imperfections and roughness in the plywood, ensuring a better finish. Before sanding, make sure to remove any sawdust from the surface to ensure proper adhesion of the waterproofing materials.
Lightly sanding helps create an even surface, making it easier to apply the chosen method of waterproofing. You can also use medium-grit sandpaper (60-100 grit) for further smoothing and removing any remaining roughness on the sheet. Waterproofing plywood will be more successful if you take these extra steps you may be tempted to avoid.
Applying Optional Priming or Staining
To further enhance the waterproofing properties of plywood, you have the option to apply a primer or stain before sealing it. Priming helps create a smooth surface for better adhesion of the waterproofing sealant and adds an extra layer of protection against moisture.
Staining, on the other hand, not only provides a beautiful finish but also helps protect the wood from UV rays and prevents discoloration over time.
Before applying any primer or stain, make sure to clean off any dirt or debris from the plywood surface. Sand down any rough areas with 100 to 180 grit sandpaper for optimal results.
Once prepped, you can proceed with applying either a suitable exterior-grade primer or a high-quality exterior wood stain.
By taking this additional step in your plywood waterproofing process, you're ensuring that your project is equipped with maximum protection against water damage while also enhancing its aesthetic appeal.
Applying the Chosen Plywood Waterproofing Method
To ensure effective waterproofing of plywood, the chosen method must be applied correctly. One popular option is using waterproof paint, which provides a quick and easy solution for sealing plywood.
Another method involves applying polyurethane, a protective coating that creates a barrier against moisture. Epoxy sealant is often recommended for plywood used in marine applications due to its exceptional water resistance properties.
Alternatively, plastic sheeting can be used as a barrier by covering the entire surface of the plywood. Lastly, applying a drying oil such as linseed or tung oil can add protection while also enhancing the natural beauty of the wood.
That’s How to Waterproof Plywood
Waterproofing plywood is a crucial step to protect it from warping, and wood rot, and prolong its lifespan, which is important with the expanding market for plywood. Using methods such as waterproof paint, polyurethane, epoxy sealant, plastic sheeting, or drying oil, you can effectively seal the plywood and make it moisture-resistant.
Remember to clean the surface properly before applying and consider the plywood's intended use when choosing a method. Whether you're working on outdoor furniture or construction projects, taking the time to waterproof your plywood will ensure its durability and longevity. That's waterproofing plywood made easy!
You'll Also Enjoy:
- Particle Board Subfloor - Too Many Negatives
- Floors for Sheds: Material Options & Guidance
- Are Squeaky Floors a Structural Problem?
- Can You Use Pine-Sol on Wood Floors? Yes, But…
- 33 Parts of a Roof: Diagrammed to Understand
Author: Omar Alonso
 Omar has over twenty years of experience as a professional handyman and electrician, with an emphasis in HVAC, general maintenance and repairs, and interior and exterior construction. He shares this knowledge with us as a writer on these topics. He is also a voracious reader. Omar serves as editor for our editorial team, author, and as a source of endless information for our researchers. Learn more on Omar's author page and all about Worst Room here.


