Aluminum Foil on Windows to Deflect Heat & Light
Author: Omar Alonso | Editor: Omar Alonso
Review & Research: Jen Worst & Chris Miller
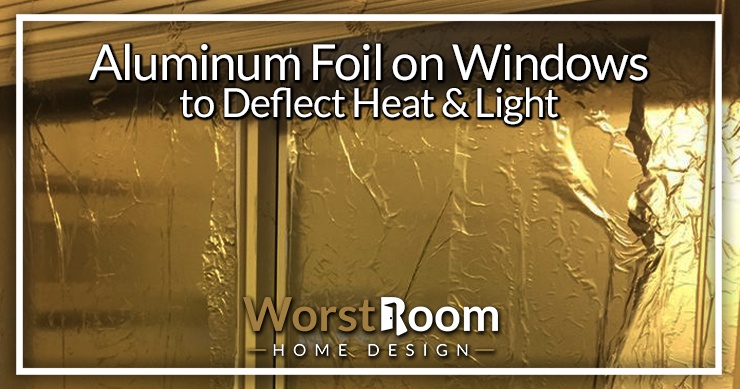
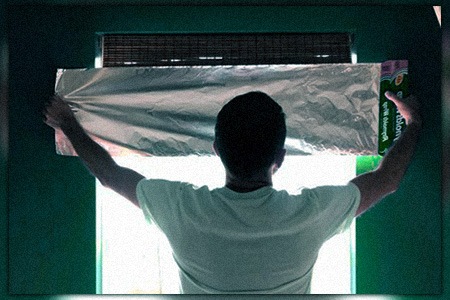
Homeowners increasingly opt for aluminum foil on windows to boost their residence's energy efficiency and comfort, especially in unused rooms. This versatile material offers several benefits, such as heat reduction, light control, and cost savings. In this blog post, we'll delve into the advantages of aluminum foil your on windows and provide a step-by-step guide for proper installation.
Preparing your windows for aluminum foil application is crucial to ensure its effectiveness. We'll discuss how to clean the window surface, accurately measure and cut the foil, and apply adhesive to secure it. Once installed correctly, maintaining aluminum foil on your windows is relatively simple; however, regular cleaning and inspection are necessary.
Benefits of Aluminum Foil on Windows

Using tin foil on windows can provide various benefits for homeowners looking to improve their homes. You get the same advantages as you do from putting aluminum foil in the oven. These advantages include heat reduction, light reduction, and cost savings. Let's explore each benefit in more detail.
Heat Reduction
Does putting aluminum foil on windows keep the heat out? Aluminum foil's reflective nature can diminish the heat penetrating a home, especially in warm weather when air conditioners and fans are insufficient. The reflective properties of aluminum foil help bounce back sunlight and prevent it from heating your living space.
So does aluminum foil reflect heat? Yes, and the reflective nature of aluminum foil can be a great help during sweltering summer days when you aim to keep your home cool without depending too much on air conditioning units or fans.
Light Reduction
If you have rooms in your house where excessive sunlight is an issue, such as bedrooms or home theaters, using tin foil on windows can effectively reduce glare and create a darker environment inside these spaces. By blocking out unwanted light, you'll improve the ambiance and protect furniture and other items from fading due to prolonged exposure to direct sunlight.
Cost Savings
In addition to improving comfort levels within your home by controlling temperature and lighting conditions, installing tin foil on windows can also lead to substantial cost savings over time.
By reflecting heat away from your living areas rather than absorbing it through window glass panes like traditional curtains do, this simple DIY project helps lower energy bills by decreasing the need for cooling devices such as air conditioners or electric fans during warmer seasons while still maintaining desired indoor temperatures throughout cooler months too.
Using aluminum foil on windows offers many benefits, including heat and light reduction and cost savings. With proper preparation, you can ensure a successful installation of aluminum foil to your window frames.
Preparing Your Windows for Aluminum Foil Installation
Before installing aluminum foil on your windows, preparing the surface and gathering all the necessary materials is essential. This will ensure a smooth installation process and optimal heat reduction, light reduction, and cost savings.
Cleaning the Window Surface
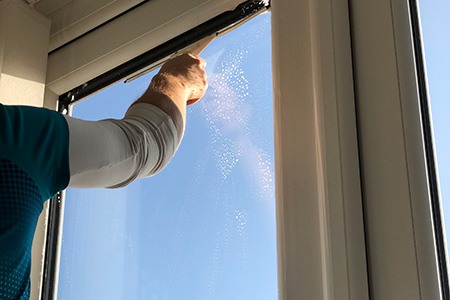
The first step in preparing your windows is cleaning the glass surface thoroughly. Dirt, dust, or grime can interfere with the adhesive used to secure the aluminum foil and may cause it to peel off prematurely.
Measuring & Cutting the Foil
To achieve proper coverage on your windows, measure both their width and height accurately using a tape measure before cutting out pieces of aluminum foil accordingly:
- Add an extra inch (or two) to each measurement for overlap purposes—this ensures complete coverage without gaps that could let light through or compromise insulation efficiency.
- Cut sheets of aluminum foil according to these measurements using scissors or a utility knife—be sure they're large enough so you don't have any uncovered areas when applying them later.
Applying Adhesive to the Window Frame
There are several ways you can attach aluminum foil directly onto window frames depending on what works best for specific situations:
- Double-sided tape: A popular option because it's easy to use; simply apply strips of double-sided tape along the edges of your window frame, then press aluminum foil onto it.
- Glue: For a more permanent solution, use glue specifically designed for glass surfaces—apply a thin layer to the backside of the aluminum foil and carefully press it against your window frame. Allow ample time for drying before moving on to installation.
- Spray adhesive: Another option is using spray adhesive—follow manufacturer instructions closely when applying this product, as improper usage could result in damage or ineffective adhesion.
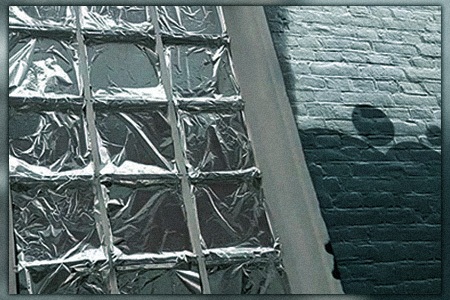
It's important to note that putting aluminum foil on windows can damage windows if not done properly. Avoid using tin foil or other materials that could cause damage. Additionally, bubble wrap can be used as an alternative to aluminum foil for insulation as a plastic wrap alternative.
Once the window surface is clean and you have measured, cut, and applied adhesive to your window frame, it's time to install the aluminum foil. To ensure a secure installation of your new window covering, tape or glue should be used to secure the foil before sealing around the edges with caulk or sealant for added protection.
Installing Aluminum Foil on Your Windows
Once you have prepped your windows, the installation of aluminum foil can begin. To ensure an effective installation, follow the steps outlined below.
Securing the Foil With Tape or Glue
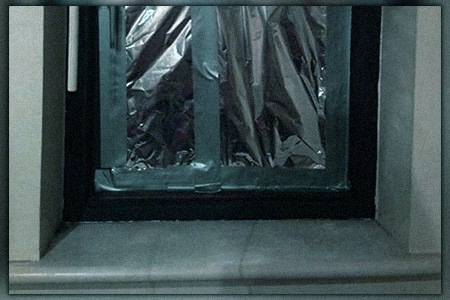
To begin, carefully place the cut piece of aluminum foil onto the window surface where the adhesive has been applied. Make sure that the shiny side faces outward while doing this step, as it helps in reflecting sunlight more effectively. Once positioned correctly, use either tape or glue to secure the edges of the foil onto your window frame.
Sealing Around Edges and Corners With Caulk or Sealant
To prevent air leaks and improve insulation efficiency, seal around all edges and corners of your newly installed aluminum foil using caulk or sealant suitable for glass surfaces.
Apply a thin bead along each edge where there might be gaps between the window frame and foil material; then smooth out any excess product using an applicator tool or finger wrapped in plastic wrap (to avoid direct contact).
Finishing Touches: Trimming Excess Material & Removing Air Bubbles
To achieve a clean finish for your aluminum foil installation, trim any excess material using a sharp utility knife or scissors while being cautious not to damage the window glass.
Finally, remove air bubbles trapped between the foil and glass surface by gently pressing them towards the edges with a flat object like an old credit card or plastic squeegee until they escape through gaps at the sides.
Congratulations. You've successfully installed aluminum foil on your windows—now enjoy improved insulation efficiency & reduced energy costs.
Maintaining Aluminum Foil on Windows
Maintaining aluminum foil on your windows is essential to ensure that it continues to provide the benefits of heat and light reduction and cost savings.
Cleaning the Surface Regularly
To ensure your aluminum foil is functioning optimally, it's essential to regularly clean its surface. Dust and dirt can accumulate over time, reducing their effectiveness in blocking sunlight and heat transfer. To clean the foil:
- Gently wipe down the surface with a soft cloth or duster.
- For tough spots, mix a few drops of dish detergent with some H2O and lightly dab the area.
- Avoid using abrasive cleaners or scrubbing pads that could scratch or damage the foil's reflective coating.
Checking for Damage & Making Repairs as Needed
Inspect your aluminum foil-covered windows periodically for signs of wear and tear, such as tears, holes, peeling edges, or bubbling areas caused by trapped air between layers. If you notice any issues:
- Carefully trim away damaged sections using scissors; avoid pulling at loose edges, which may cause further tearing.
- Patch small holes with adhesive tape designed specifically for repairing metal surfaces like duct tape; alternatively, use a piece cut from spare aluminum foil secured with glue around the edges, ensuring an overlap onto the undamaged area surrounding the hole, providing adequate coverage preventing future deterioration due to weather exposure, etc.
By following these simple steps, you can ensure that your aluminum foil remains effective in reducing heat and light transfer, saving you money on energy costs. Remember to regularly clean and inspect your foil and repair it to keep it in top condition.
Aluminum Foil on Windows Can Deflect Heat
In conclusion, aluminum foil on windows can provide many benefits, such as reducing heat and light and saving costs. Proper preparation and installation are important to ensure the effectiveness of the foil. Regular upkeep is essential to maintain its good state.
You'll Also Enjoy:
- Securing Basement Windows With 10 Easy Methods
- A Kitchen Without Windows Can Still Satisfy & Here's How
- Where to Place Curtain Holdbacks for a Sleek Decor
- 11 Alternatives to Shutters to Spruce Up Exterior Windows
- 16 Types of Shutters to Protect & Beautify Your Windows
Author: Omar Alonso
 Omar has over twenty years of experience as a professional handyman and electrician, with an emphasis in HVAC, general maintenance and repairs, and interior and exterior construction. He shares this knowledge with us as a writer on these topics. He is also a voracious reader. Omar serves as editor for our editorial team, author, and as a source of endless information for our researchers. Learn more on Omar's author page and all about Worst Room here.


