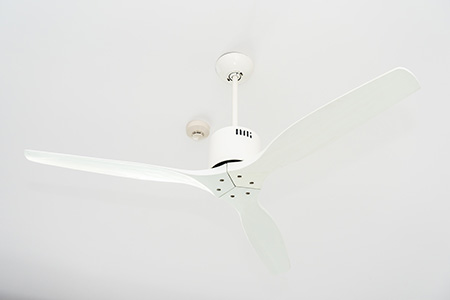
Why is My Ceiling Fan Clicking? Fix Common Issues
Author: Omar Alonso | Editor: Omar Alonso
Review & Research: Jen Worst & Chris Miller
If you've noticed your ceiling fan clicking, it's essential to identify and address the root cause promptly. A clicking ceiling fan can be bothersome and may signify a problem that could cause more harm or even create a safety hazard. Lets explore various factors contributing to a clicking ceiling fan and provide practical solutions for resolving these issues.
From troubleshooting common causes of clicking noises to DIY fixes for problematic fans, our comprehensive guide covers everything you need to know about maintaining optimal performance and ensuring the longevity of your ceiling fan.
Armed with this knowledge, you'll be well-equipped to tackle any ceiling fan clicking problems head-on and restore peace and quiet in your home.
Common Causes of Ceiling Fan Clicking
The most frequent reasons for a clicking sound in your ceiling fan include:
- Loose screws or bolts on the blades or motor mounts
- Bent or warped blades causing imbalance
- Dry bearings within the motor housing requiring lubrication
- Faulty motor mounts needing replacement
These are the typical reasons a ceiling fan makes a clicking noise. Start your investigation here first to save time and eliminate some more obvious possibilities from these types of fans.
Clicking Fan Troubleshooting Tips
To identify the cause of your noisy ceiling fan, follow these simple steps:
- Turn off power to the fan at both switch and breaker levels.
- In case there are any loose parts, like light fixtures, attached to the fan, remove them temporarily.
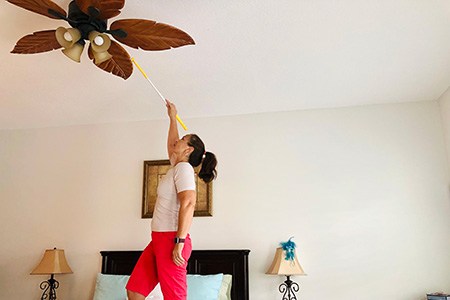
- Inspect each blade individually for signs of damage or warping.
- Check all screws and bolts securing blades and those attaching the motor mounts to ensure they're tight.
- Spin the fan gently by hand to listen for any unusual sounds from the motor housing.
If you still haven't identified the problem after completing these steps, it may be time to call a professional electrician or consider purchasing a new fan.
DIY Fixes for Clicking Fans
If you've determined that one of the problems listed above is why your ceiling fan is making a clicking noise, here are some DIY fixes you can try.
1. Check the Motor Mounts
If you're hearing a clicking noise from your ceiling fan, it's possible that the motor mounts are to blame. These small components help secure the motor in place and can become loose or damaged over time, causing unwanted noises.
Signs of a Faulty Motor Mount
A few common signs that your motor mount may be causing the ceiling fan clicking noise include:
- Vibrations felt throughout the fan when it's running.
- Visible wobbling of the fan while in motion.
- An increase in noise level as you raise the speed of your fan.
- The sound becomes louder near where the blades attach to the motor housing.
How To Replace a Motor Mount
To replace a faulty motor mount on your ceiling fan, follow these steps:
- Turn off power at the wall switch and circuit breaker before working on your ceiling fan.
- Remove all screws holding blade arms onto mounting brackets (this will vary depending on the model).
- Carefully remove each individual blade arm by gently pulling away from the bracket.
- Locate screws securing the old mount assembly; unscrew them completely using the appropriate screwdriver size/type (again dependent upon the specific unit).
- Once removed, examine the replacement piece, ensuring compatibility before the installation begins.
- Align the new mount with holes on the motor housing, then secure using the screws provided.
- Reattach blade arms to mounting brackets and tighten all screws firmly.
2. Inspect the Blades & Balance Them Out

If your ceiling fan has begun to wobble or make a clicking sound, likely, the blades are not in equilibrium. In this section, we'll discuss signs of unbalanced blades, how to balance your ceiling fan blades, and tips for balancing your ceiling fan blades.
Signs of Unbalanced Blades
Unbalanced blades can cause issues with your ceiling fan's performance and may lead to more severe problems if left unchecked. Some common signs indicate unbalanced blades:
- Your ceiling fan wobbles when in operation
- The clicking sound intensifies as the speed increases
- You notice visible gaps between the blade tip and the ceiling at different points around the circumference of the fan
How To Balance Your Ceiling Fan Blades
Balancing your ceiling fan blades isn't too difficult; just follow these simple steps:
- Clean each blade thoroughly with a damp cloth to remove any dust or debris affecting its weight distribution.
- Using a tape measure or ruler, check each blade's distance from both ends (tip) to ensure they're all equidistant from one another and level with respect to their mounting brackets on either side.
- Check for loose screws connecting each bracket holding up individual fan arms. Tightening those might solve imbalance issues without further adjustments needed.
3. Tighten up Loose Screws & Bolts
A ceiling fan clicking noise can often be attributed to loose screws and bolts, which can cause the fan to wobble or vibrate while in operation. In this section, we'll discuss how to identify these loose components, tighten them up, and share some tips for ensuring your fan remains secure.
Identifying Loose Screws and Bolts
To find any loose screws or bolts on your ceiling fan:
- Switch off the power to your fan by cutting the circuit.
- Inspect all visible screws around the motor housing, blade brackets, downrod assembly, canopy cover plate (if applicable), light kit (if present), and wall control unit (for fans with remote controls).
- Gently wiggle each component of your ceiling fan—if you notice any movement or rattling sounds when doing so, it's likely that there are loose connections.
How To Tighten up Loose Screws & Bolts
If you've identified any loose parts on your ceiling fan:
- Gather a screwdriver or wrench that matches the size of the screw heads or bolt nuts.
- Tighten each screw/bolt until snug but not overtightened—over-tightening could strip threads or damage components.
- If a screw doesn't seem to hold tight even after tightening it fully, try adding a thread-locking compound like Loctite before reinserting it into its hole; this will help keep it securely in place without loosening again over time due to vibrations from regular use of your ceiling fan.
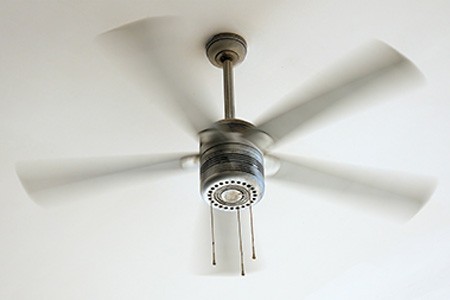
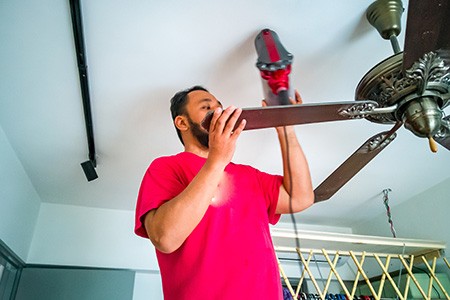
4. Lubricate the Bearings in the Motor Housing
If your ceiling fan clicking is rather frequent, it could be due to dry bearings in the motor housing. This can cause friction and noise as your fan operates. In this part, we'll cover indications of dried-out bearings, the best way to grease them up, and strategies for maintaining those bearings properly lubricated.
Signs of Dry Bearings in the Motor Housing
Dry bearings can lead to a variety of issues with your ceiling fan's performance. Some common signs that you may have dry bearings include:
- A clicking or grinding noise while the fan is running
- Decreased efficiency or slower spinning blades
- Vibrations felt through walls or ceilings when the fan is on
- An overheating motor during operation
How To Lubricate the Bearings in the Motor Housing
Lubricating your ceiling fan's motor housing will help reduce friction and keep things running smoothly. Follow these steps to properly lubricate those pesky dry bearings:
- Remove light kit (if applicable): If there's a light kit attached to your ceiling fan, remove it carefully according to the instructions provided by the manufacturer.
- Remove blades: Unscrew each blade from its bracket using a screwdriver and set them aside safely so they don't get damaged.
- Access motor housing: Locate screws holding the upper canopy cover together, then remove them using a screwdriver. Carefully lower the canopy cover to expose the motor housing.
- Apply lubricant: Use a non-detergent, lightweight oil specifically designed for ceiling fans (such as 3-in-1 motor oil) and apply it directly onto the bearings. A few drops should suffice; do not over-lubricate, as this can cause issues with performance.
- Reassemble fan: Once you've applied lubricant, reattach the upper canopy cover, blades, and light kit (if applicable) in reverse order of disassembly. Turn the power back on at the breaker box before testing your newly-lubed fan.
No longer do you need to dream of ceiling fan alternatives to avoid these kind of issues. You can do maintenance to your fans yourself as long as you're not dealing with some catastrophic issue.
So Why is My Ceiling Fan Clicking?
Troubleshooting tips and DIY fixes include inspecting the motor mounts for signs of damage or wear, balancing out the blades to reduce wobbling, and tightening up any loose screws or bolts. Lubricating the bearings in the motor housing can also help to eliminate clicking sounds.
If you're experiencing a ceiling fan clicking annoyance, don't hesitate to try these simple fixes before calling in an expert. Attempting these steps can help you quickly and effortlessly restore your ceiling fan to peak performance.
You'll Also Enjoy:
- Should You Install a Ceiling Fan in the Kitchen?
- Circuit Breaker Won't Reset? 4 Reasons & Solutions
- Your Refrigerator Making a Clicking Noise? 5 Reasons
- Is a Squeaky Dryer Dangerous to Keep Using?
- Can a Bathroom Fan Vent Into an Attic? No & Why
Author: Omar Alonso
 Omar has over twenty years of experience as a professional handyman and electrician, with an emphasis in HVAC, general maintenance and repairs, and interior and exterior construction. He shares this knowledge with us as a writer on these topics. He is also a voracious reader. Omar serves as editor for our editorial team, author, and as a source of endless information for our researchers. Learn more on Omar's author page and all about Worst Room here.


