How to Build a Rock Drainage Ditch Like a Pro
Author: Chris Miller | Editor: Omar Alonso
Review & Research: Jen Worst & Chris Miller

A drainage ditch is a common feature in rural areas. It serves the purpose of directing water away from locations in the yard or fields where it might cause flooding damage. So many of need to learn how to build a rock drainage ditch for at least one area of our yards or property.
Homeowners can benefit from digging a drainage ditch if their property is close to a floodplain, or they experience heavy water flows during violent rainstorms that dump loads of water onto their property.
This article discusses using a rock trench to relocate water from one area of your property to other locations where it won’t cause massive amounts of property damage.
How to Build a Rock Drainage Ditch – A Step-by-Step Guide

Building a rock drainage ditch as a french drain alternative is an effective and easy way to prevent water from running downhill, where it could flood your home or damage your landscaping.
Your rock drainage ditch can have a straight, simple design, or it can feature natural bends with wider areas, creating the visual of a dry creek bed when it’s not moving water around.
This step-by-step guide gives you everything you need to know about building a drainage ditch on your property.
1) Materials & Tools
Digging out a rock drainage ditch is a labor-intensive task. So, you’ll need the right tools, planning, and strategy for lasting results. Before you start your planning and the job, ensure you have the following tools ready for use:
- Mattock or pickaxe
- Shovel
- 3/4 inch gravel or #3 crushed stone
- Water-permeable landscaping fabric
- River stones, rocks, or fieldstones
You can also plan for landscaping features like lilies or other water-loving plants to line the edges of the ditch. Landscaping elements create an eye-pleasing visual aesthetic, hiding a bare ditch.
2) Plan Out the Ditch Building Site
The drainage system works best when positioned to move the water traveling downhill into the side of the ditch. When the water enters, it flows downhill and away from the source area.
Correctly designing the ditch requires angling across any slopes to assist with the better catchment of water, carrying it away from problematic areas where it may damage your home or landscaping.
Follow these tips when planning the site:
- The drainage ditch should drain areas of standing water or catch water flowing downhill.
- The trench should slope at a minimum gradient of 1 inch every 10 feet for effective drainage.
- The drainage ditch may need to curve at an angle to catch the water and drain it downhill.
- Add bends and curves to its design to give the ditch a natural look.
- We recommend measuring the slope of your yard to ensure proper drainage.
Again, make sure you have at least 1 inch of slope for every 10 feet, if not a bit more if you can manage it. Otherwise you can end up with standing water and a drainage ditch that isn’t incredibly effective.
3) Excavate the Drainage Ditch
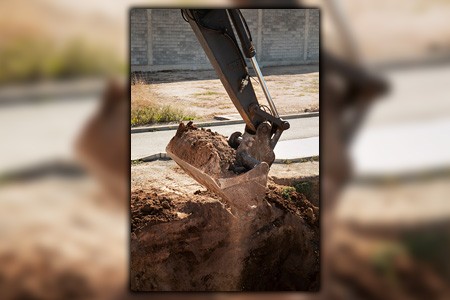
Next, it’s time to get to work. This is the actual doing part of how to build a rock drainage ditch. When excavating the ditch, remember that the gully should be wider than it is deep. It’s the direct opposite of French drains that are deeper than they are wide. We recommend digging out a width of 36 inches and a depth of 18 inches.
This design prevents washouts, erosion, and a flooded drainage ditch. Here are some useful tips to adhere to when digging it out:
- Dig to 18 inches deep
- Dig 36 inches wide
- Widen the ditch in bends to give it a more natural look
Depending on the aesthetic you want to create with the ditch, straighten or slope the sides in areas to give it a more natural look. Remember that digging sheer sides to the trench makes them prone to erosion, and you’ll need to reinforce the sides with rocks to prevent them from collapsing.
4) Line the Ditch with Landscaping Fabric
Line the ditch with water-permeable landscaping fabric after digging it out. The material provides a barrier for the sides of the trench, preventing weeds from popping up while stopping erosion during heavy water flows.
Adding landscaping fabric also helps to contain the gravel in the trench, preventing it from mixing with soil. As a result, your ditch maintains its draining capacity over time.
- Line the sides and bottom of the ditch with the landscaping fabric.
- Extend the landscaping fabric 12 to 18 inches over the sides of the trench.
It’s always better to use more landscaping fabric than too little. Using too little material won’t safeguard the edges of the ditch from weed growth and erosion. Adjusting it once finished is a monstrous task, so do it right the first time to prevent unnecessary modifications later on.
5) Add the Rock or Gravel
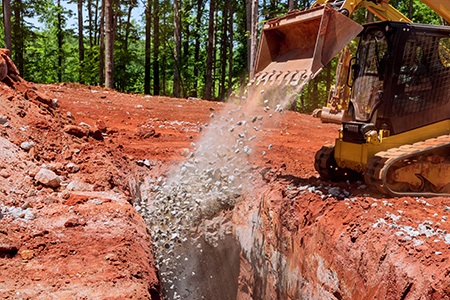
Add a layer of rock or gravel on top of the landscaping fabric, and aim for an 8-inch depth for the best results. We recommend using #3 crushed stone or large rock ranging from 3/4 to 2 inches in diameter for medium to heavy water flow. For lighter flows you can use 1/2 to 1 inch gravel.
- Add 8 inches of gravel or crushed stone to the bottom of the ditch, spreading it across the landscaping fabric.
- Use 3/4 inch gravel or #3 crushed stone.
- After pouring, fold the excess landscaping fabric over the gravel layer.
There's no point in learning how to build a rock drainage ditch if you mess up this step. Don’t use gravel smaller than a pea-size as it will wash away under the water flow. Using large rocks in a gravel drainage ditch assists with allowing the water to permeate the soil. Small gravel will either wash away under heavy flows or compact, causing a flooded drain that doesn’t provide you with any benefit.
6) Cover with Rocks or River Stones
After laying the gravel bed, you’ll top it with river stones, rocks, or fieldstones. Adding the rocks stabilizes the landscaping fabric and gravel, ensuring it doesn’t wash away while improving drainage.
It also serves the purpose of hiding the landscaping fabric, creating an organic look to the ditch. We recommend choosing river stones for a natural, creek-like appearance.
You can select any type of rock for the layering task, but make sure they have a medium size to enhance the drainage effect in the ditch and prevent waterlogging. Don’t add sand; it will compact the gravel and allow weeds to root.
7) Landscape the Borders
Now that your drainage ditch is ready for action, it’s time to spruce it up to give it more visual appeal. We recommend placing field stones along the perimeter, filling the gaps between the rocks with plants like lilies, horsetail rush, and irises.
However, plant the flowers on the opposite side of the drainage ditch to that which accepts the water flow. This planting strategy prevents the plants from washing away if there’s a heavy water flow. While the drainage ditch is a functional yard component, it doesn’t have to look like an eyesore.
Selecting the Right Rock Sizes for Your Drainage Ditch

Follow these tips for choosing the right rock to build your drainage ditch:
- Mid to large-sized rocks offer the best utility and drainage for your ditch. The smaller you go, the more you risk compaction, causing the trench to flood.
- Gravel and rock should be no less than ¾-inch in size.
- Typically, when ordering from suppliers, you’ll find this gravel labeled as #3 landscaping gravel.
- Crushed stone #3, landscaping gravel, and 3/4 inch gravel are ideal for drainage ditches.
- Choose angular rock to avoid compaction.
- Don’t use round gravel, sand, or small rocks; they’re prone to slipping and offer poor drainage. These drain poorly and are prone to sliding.
You want to avoid sliding as well as any material sizes that will gather up leaves and sticks and other debris from the yard that will impede the ability of water to flow.
Having a drainage ditch is great but you don’t want to create a new chore of needing to clean it out all the time. We already deal with that with our gutters. Do expect to have to do it with a drainage ditch which is basically a gutter alternative, but it shouldn’t be a monthly chore.
FAQ’s Concerning How to Build a Rock Drainage Ditch
Let’s cover some of the most common questions that arise when discussing rock-lined drainage ditches.
What Is the Best Rock Size for a Drainage Ditch?
Typically, you’ll need to use 1/2 inch to 1-inch gravel to line the drainage ditch and prevent compaction. Areas that receive higher water flows need larger rocks. The larger the stones, the better the drainage and chances of permeating the soil, resulting in less chance of a flooded drainage ditch.
How Thick Should the Gravel Layer be When Designing a Drainage Ditch?
We recommend laying a minimum 8-inch layer of gravel on the landscaping fabric that lines the ditch. The deeper the ditch, the thicker the gravel layer must be to ensure proper and effective drainage. Place all drainage pipes on the gravel bed in the trench.
What Are the Best Rocks to Use When Building a Drainage Ditch?
We recommend using field stones, river stones, or larger rocks for the final layer lining the drainage ditch. These stones keep the landscaping fabric from slipping under heavy water flows while improving drainage throughout the trench length.
Key Takeaways for Building a Rock Drainage Ditch
Let’s recap the main points from above to help you solidify the knowledge you’ve gained about building a drainage ditch with rocks.
- Building a drainage ditch in the yard prevents heavy water flows from flooding your home or destroying your landscaping.
- Plan the rock ditch to collect stormwater and funnel it downhill, away from areas it might damage.
- Dig the trench at least 18 inches deep and 36 inches wide, preferably with sloping sides.
- Line the ditch with landscaping fabric, overlapping the edges by a minimum of 12 to 18 inches.
- Add a layer of smaller gravel, covering it to at least 8 inches deep.
- Fold the excess fabric over the gravel.
- Top the landscaping fabric with river stones, field stones, or large rocks – or a combination of the three.
You can finish the design by planting water-loving plants along the opposite bank to the water-catching side of the trench.
That's How to Build a Rock Drainage Ditch That Works
Another thing to consider is you don't want such a steep slope that you end up with erosion. The rocks will break up the flow of the water to help prevent this from happening, but a great way to prevent erosion is to ensure the water can't pick up that much speed in the first place. And that is how to build a rock drainage ditch. Have fun with it and enjoy the fruits of your hard work!
You'll Also Enjoy:
- 13 Types of Gutters to Carry Rainwater Safely Away
- How Long Can a House Go Without Gutters?
- 5 Washing Machine Drainage Options: Easy & Fast
- Can You Still Use Water if Your Water Heater Is Off
- Can You Lay a Water Heater on its Side?
Author: Chris Miller
 Chris has over a decade of experience in the lawn care and maintenance industry. His intricate understanding of the procedures and tools required knows no bounds. Chris serves as reviewer and researcher for our editorial team and as an author in his areas of expertise. Learn more on Chris's author page and all about Worst Room here.


