How to Grow Chives & Get a Bountiful Harvest Like Never Before
Author: Jen Worst | Editor: Omar Alonso
Review & Research: Jen Worst & Chris Miller
Learning how to grow chives is simple. The hard part is being patient before the harvest, making sure you water, feed, and care for your plants in the mean time.
Few things match the joy and flavor of a fresh herb garden in the house. Chives are an integral part of most herb gardens and it’s not surprising because of the different ways in which they are useful, even beyond flavoring food.
Chives are low-maintenance herbs with leaves that taste like onions with a more subtle flavor. They also have beautiful and edible pink-purple flowers that can be used as types of garnish on salads.
How to Grow Chives
You're here on a mission, so let's waste no time. We'll cover which types of chives to choose from, when and how to plant them, how to care for them and recognize they're mature, and then onto harvesting and storing them for future use.
Types of Chives
Typically, you will find two types of chives in a home herb garden: Allium schoenoprasum or common chives and Allium tuberosum or garlic chives. Both are technically types of allium.
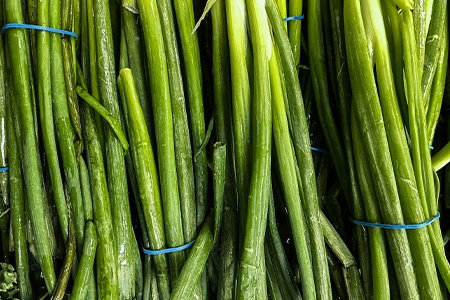
The first type, consisting of conical and slender bulbs, produces edible leaves and flowers. The leaves are blue-green in color and look like tubes that grow up to 10 to 15 inches tall. The flowers range from white to pink, purple or red.
The second type of chives have flat and green leaves. They grow up to 20 inches in height and have a subtle garlic flavor. The flowers are large and grow in dense clusters. I prefer these, but you can definitely try both.
When to Plant Chives
If you’re planting chives in the spring, you can grow them outdoors. But if this is anywhere between March and June, you might want to keep them indoors in pots or plug trays.
The best time to plant chives is 4 to 6 weeks before the last frost in spring. That means you should start them indoors about 6 to 8 weeks before the last frost, moving them outdoors after the seedlings are established and healthy.
The ideal temperature is between 65 to 70 degrees Fahrenheit. After planting the seed, cover it with compost to keep it moist after the initial watering.
When the seedlings are large enough, move them into pots in groups. A pot that is 3 to 4 inches can handle about 4 to 6 seedlings. At this stage, they should be grown in cooler conditions. That should be about 50 degrees Fahrenheit.
Take them outdoors gradually to acclimatize them. This is called hardening. This takes anywhere between 10 to 14 days, adding a couple hours of outside time per day. That's the complete sowing process, to be followed closely for best results.
How to Plant Chives
The process, as always, starts with preparing the soil. You can add compost or any other soil improver. Once the soil is of the right tilth, prepare to sow the seeds. Make sure you thin out the seeds and place them about 9 to 12 inches apart.
It's suggested to grow 4 clumps of chives if your goal is to cook with them immediately. If you intend on storing your harvest, growing 6 clumps is plenty. Storing more may mean you can't use them before they go bad.
Chives like all types of parsley can be planted outside throughout the year. So, dig the place where you want to plant them and add organic matter like compost. If you’re dealing with heavy clay, leafmould is a good choice to soften the soil up and help it drain well.
Dig a hole to accommodate the root ball of the chives and place it such that the top of the leaves is at the same level as the soil. Then add some more organic matter to the soil that you dug out earlier and fill it in the planting hole.
Now is a good time to add granular plant food to the soil. Make sure it to place it all around the plant and then add water to it. Make sure the water drains so there's no root rot or other issues, then return daily with more water, keeping the soil moist but not sopping wet.
How Long Do Chives Take to Grow?
Chive seeds will germinate in 2 to 3 weeks after planting if the temperature is around 60 degrees Fahrenheit. They will mature around the 5th week after planting.
After hardening them outdoors over 10 to 14 days, they will continue to grow and ultimately bloom their flowers by mid-spring to early summer. They can then be harvested. The total time to harvest chives is around 50 to 60 days.
How to Harvest Chives
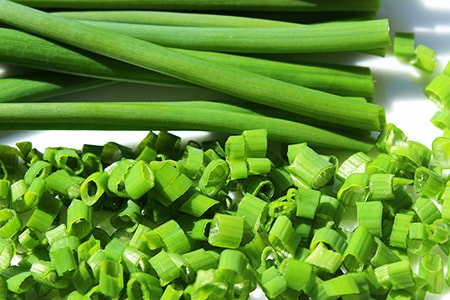
Then comes harvesting. This process is largely limited to using a pair of scissors or sharp knife. Take from the outermost leaves first. When you do so, cut at the base of the leaves so you don't leave any snipped tops.
You'll want to leave about 2 inches of the leaf blade, measured from the soil. This allows them to regrow so you can have multiple harvests. This helps the bulbs stay strong and healthy as well, while promoting new growth.
Stop harvesting from them about 3 weeks to a month before the first frost date so they have a chance to flower, re-established, and reach maximum health.
Once the leaves are all grown out, chop the leaves closest to the edge of the pot and slowly move inwards. This will ensure you're taking the most mature parts first and allowing the others to continue to maximize the harvest.
In the first year, you should leave the plant alone till July so that the roots can establish themselves. If you don't want to wait, rotate two batches so that you can leave one alone while harvesting from the other in the first year.
Wait until the plants are about 6 inches tall. This should be around the 5 week mark after planting the seeds. If the plants are over a year old you can harvest from the regularly, but if not, be careful how much you take from them.
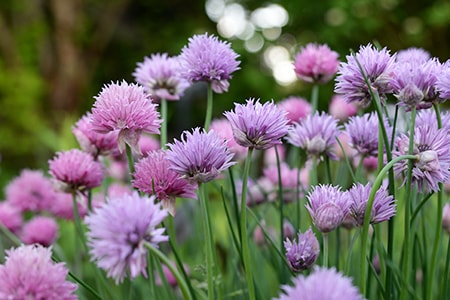
Chives Flowering
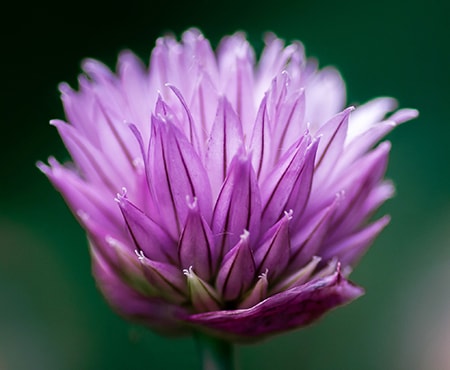
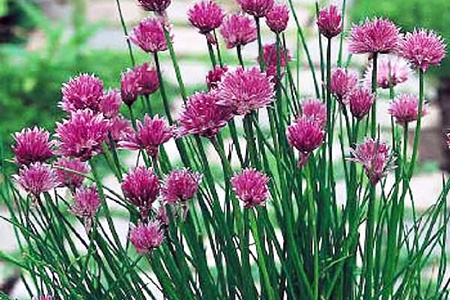
Remember to leave about two inches of leaves to let them grow back rapidly. This cutting of leaves is an ongoing process in the growing season. And towards spring, they produce a bunch of purple flowers.
If you want the plants only for their leaves, remove the flowers as soon as possible so that they don’t restrict the growth of new leaves.
If you are planning on eating the flowers too, because they are edible, keep a couple of plants for that purpose. Once the flowers begin fading, cut the plant two inches from the ground and the second set of leaves will start to emerge.
The process of harvesting should ideally start about 30 days after the transplant or 60 days after the seeding process begins.
The edible flowers are great in salads but remember to separate the head of the flowers which is a cluster of smaller flowers.
The bulbs of these plants are edible too but it is not recommended to eat them. Then there’s the stalk that can be eaten but it has no taste and is quite tough to chew your way through it.
How to Store Chives
Refrigeration: Chives are best consumed when they are fresh off the plant. But if you want to store them, you can cut the base of the leaves and place them in a glass filled with water to a couple of inches of height. Keep an eye on them and replace the water regularly.
You can also wrap them in a moist paper towel or paper towel alternatives and place them in a sealed plastic bag in the refrigerator. They can last this way for up to 7 days. Make sure to wash them before storing.
Freezing: You can also chop the leaves into small pieces and freeze them in containers or plastic bags. Cutting them first helps ensure even freezing and makes it more convenient to use once you defrost them.
Drying: Before you refrigerate them for use in the coming week, it's best to dry them out a bit to reduce the risk of them going bad. Placing them on a screen or paper towel in a warm spot near a window or on your porch is the best way to do this. Make sure there's enough air circulation in the area.
Any way you store them though, make sure it's done in an airtight container.
Chives Plant Care
Chives are actually some of the easiest plants to maintain even after they are fully grown. They adapt well to most weather conditions but here are a few tips to keep them healthy and productive.
When planting chives, try to pick a spot that has at least six hours of direct sunlight every day. But partial sunlight for the same amount of time is also good enough.
The soil must be fertile and well draining. As mentioned earlier, adding organic matter like compost or any other all-natural fertilizer is an excellent move.
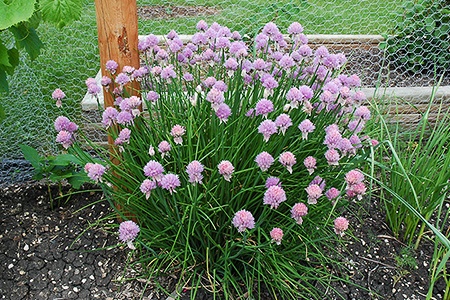
Make sure the plants are placed 8 to 10 inches apart from each other so that the plants can form a mass once they are fully grown. The logic behind this clustering is to enable black and yellow honey bees to pollinate the flowers.
If you want to see mulch between the plants, keep the plants at least one foot apart. Mulch reduces the evaporation of water from plants and reduces the need for you to water your plants.
When combined with organic stuff like pine straws, mulch helps retain moisture and suppress weeds. This spacing also improves circulation within the plants, reducing problems with pests and disease.
About moisture—newly planted clumps need to be watered daily till they are well established. This is particularly applicable in summers if the seeds are in well-draining soil.
If you’re growing the chives in a container or raised spiral herb garden, you must use potting soil so that there is better drainage. If you’re using compost, instead of going 100 percent, consider mixing it with sand or coconut coir to allow more oxygen in. This is because plants in containers tend to dry out quickly.
Chives can handle drought conditions quite well but for best results, you must water them consistently throughout the growing season. Keep the soil moist because chives grow near the surface with shallow roots.
If your soil is not rich in nutrients, use a nitrogen-heavy fertilizer as a top-dress in late spring or early summer. Once the flowers are out, remove them to avoid the spreading of seeds throughout the garden.
And finally, divide the plants into clumps of 10 small bulbs in the spring season once in every three or four years. Let them grow for a few weeks till it is time to harvest them.
What Do Chives Look Like?
Mature chives grow from bulbs that produce green, thin, tubular stalks that culminate in various colors of leaves depending on the type, typically about 10 to 15 inches tall.
What to Avoid When Growing Chives
If you have a garden with other plants in it, you must place your chives next to some types of carrots and tomatoes. If you have beans or peas, keep them far away. This is due to cross-contamination of disease and pests that they attract.
Chives also notoriously repel Japanese beetles and aphids. So, you can keep them near susceptible plants to help ward those off..
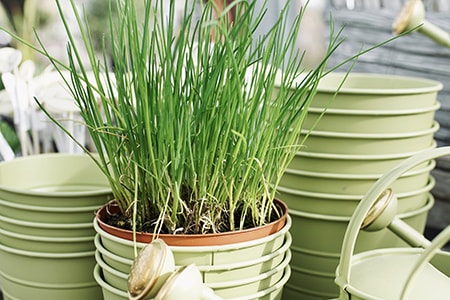
Growing Chives in Containers
Chives don’t need a lot of space, which is perfect for urban, terrace, or indoor gardeners. All you need is a few pots or containers and you’re ready to go.
Chives also grow rather happily in potting compost. But if it's lost all its nutrients, just give the soil a little liquid plant food on a monthly basis through the growing season.
They also don’t need a lot of water or attention throughout the year once established. But if you live in a cold region, pay attention to them during severe frosts. You should bring them indoors and keep them close to the walls of the room throughout the season.
That's How to Grow Chives!
Chives are an integral part of herb gardens world over. They're easy to grow and require very little care which makes them a big favorite.
They're also a preferred plant to grow for those of us who live in studio apartments with no or small balconies. They're always mentioned in various apartment garden ideas.
These plants have flowers that are not only beautiful but also edible. Apart from soups and salads, they can also be used in the making of dips and sauces.
But when used in cooked foods, they tend to lose their flavor. They also have a lot of pest-repellent properties which make them a coveted plant.
This onion-like plant is as decorative as it is culinarily utilitarian. The flowers show up in summer and the foliage grows through spring, summer and autumn. So, sow the seeds and wait for the, well, flowers of your hard work. That's how to grow chives!
You'll Also Enjoy:
- 11 Types of Ferns, Indoor & Outdoor, to Liven Up Your Space
- Backyard Farming for Everyone: Get Started Easily Today!
- How to Grow Fennel & Have a King's Harvest at Home
- How to Grow Onions by Planting & Harvesting Like a Farmer
- How to Grow Cilantro & Harvest Big Like a Farmer
Author: Jen Worst
 Jen works professionally as a gardener and frontline counselor, engaging the youth in vocational work related to gardening. She displays this same passion at home, tending to the vegetable garden and flower beds, as well as to the interior decor and cleaning. Jen serves as reviewer and researcher for our editorial team and author in her areas of expertise. Learn more on Jen's author page and all about Worst Room here.


