Can You Caulk Over Caulk? Yes, & Here is How
Author: Omar Alonso | Editor: Omar Alonso
Review & Research: Jen Worst & Chris Miller
Do you have old caulking in your kitchen or bathroom looking old a grubby? It might be time to dig it out and replace it. But wait, what if you could caulk over the old stuff? Can you caulk over caulk? That sure would save a few hours of hard work and misery.
Yes, you can caulk over old caulk. It's not the best idea, but you can do it. Ideally, you want to remove the old stuff first, but if you don't want the hassle and bother of digging out the old stuff, you can try caulking over old caulk.
This post unpacks a few methods for caulking over old caulk. We'll show you when you should and shouldn't consider doing it and how to pull it off.
What is Caulk?
Caulk is used in home and commercial projects to fill joints between grouting, tiles, or bricks. The caulk creates a watertight seal between the building materials preventing water damage.
Many people assume it's fine to caulk over old caulking, and they aren't wrong. It's not the best idea if you want complete certainty that the area will be watertight when you finish.
Why Do I Need Caulking?
Caulking is absolutely essential in construction projects, especially in areas like the bathroom and kitchen, where water might get into the joints between tiling and brickwork. Without it, water will get under the building materials, leading to rot and mold growth.
You need to caulk the building materials properly to avoid rot in your wood siding or building materials on the home's exterior. So, the property might look great from the outside, but structural issues are going on out of view under the surface.
Can You Put New Caulk Over Old Caulk?
Yes, the answer is you can caulk over old caulk if necessary. It's not the greatest fix, but if the first job wasn't very good and not effective enough, you can bolster it with a fresh layer of caulk.
In some cases, you might not be able to remove the old layer of caulking when you want to redo the job. That's okay. All is not lost; you can just caulk over the old caulk.
Removing Old Caulking
If you can remove the old caulking, it's always better to take that strategy than just caulking straight over the old stuff. Professional handypersons will recommend you rather remove the old stuff rather than caulk over it.
If you're doing patchwork over an old job, you can get away with applying new caulk over old caulk, but you should rather avoid it if you can. Caulking over the old stuff is less effective than a new layer, and it might compromise the waterproofing finish of the work.
What are the Different Types of Caulking?
You can choose from several types of caulking in DIY projects around the home. Each has different properties, but they all do the same thing and serve the same purpose.
Acrylic Caulk
Acrylic caulk is good for DIY applications to prevent moisture damage. It's easy to use and looks good. You can also paint over this caulk to blend it into surrounding materials after it's dry.
Acrylic caulk is suitable for use on interior joints that are out of view, such as windows, indoor rooms, and under kitchen cabinets. It's not the best choice for outdoor applications as exposure to the sun yellows it and reduces service life.
Silicone Caulk
Silicone caulk is a highly versatile caulking suitable for many applications. It's a very versatile material and the best choice for areas where you might experience movement in materials and joints over time. It's a good choice for larger joints but not so great for smaller ones.
Polyurethane Caulk
Polyurethane caulking is more rigid than silicone and ideal for smaller joints that don't experience much movement. It's also good for applications where silicone caulk might dry out and loosen over time. Applications for polyurethane caulk include bathtub lips and areas that get plenty of moisture, such as all types of bathtubs, showers, toilets, and sinks.
Cleaning Tips Before Caulking Over Old Caulk
If you want to try caulking over existing caulk with fresh material, give this process a try and note your results.
Clean the Area
Before you add the fresh caulk, ensure the application area is clean and dry. If you clean the clean properly, the new caulk won't stick, allowing water to seep underneath.
Cleaning Acrylic Caulk
You can use diluted dish soap on acrylic caulk. Ensure you remove all chips and flakes from the affected area. Don't use aggressive cleaners like rubbing alcohol, as it damages the old caulk, and you'll have to remove it.
Cleaning Silicone & Polyurethane Caulk
Clean silicone or polyurethane caulk using rubbing alcohol or 1 cup of bleach diluted in 10 cups of room temperature water. Don't use hot water, as it can cause the bleach to create a chemical reaction, producing dangerous chlorine gas.
Use the bleach solution to wash away the dirt and grime. Use soap sparingly as it might stick to the silicone, even with a good rinsing, causing the new caulk to fail.
Give It Time to Dry
After you finish the cleaning process, give the caulk time to dry. We recommend drying it off and waiting 24 hours to ensure it's dry as a bone before applying the new caulking.
Don't use paper towels or fibrous dishcloths to dry the area. If any residue gets left behind, it will prevent proper adhesion of the new caulking.
How to Caulk Over Existing Caulk in 12 Steps

Can you caulk over caulk? Yes, and here is how but please read all of these instructions completely before beginning, and then read them step-by-step as you proceed through them.
Step 1 – Clean the existing caulk and allow it to dry for 24 hours. Do not apply the new caulk until the old caulk is completely dry.
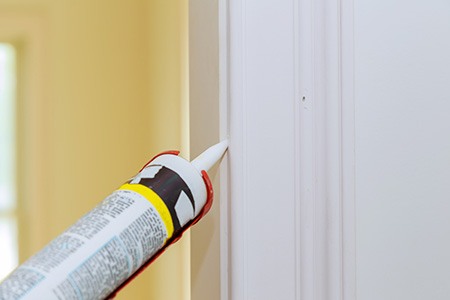
Step 2 – If a nozzle head is provided, fit the nozzle head to the caulk tube and cut the nozzle at a distance along the tip so that the openinig is the same width you want the bead to be during application. If no nozzle head is supplied, skip to step 3.
Step 3 – Place the tube of caulk in the caulking gun and cut the end with a utility blade. You may find cutting it at a 30° to 45° angle can aid in a smoother application. Attempt to have the opening be the width of the desired bead size. If you've already cut a nozzle head in step 2, do not cut again.
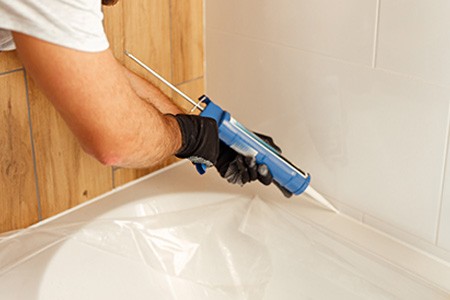
Step 4 – Depress the handle on the caulking gun to begin squeezing out caulk and run it along the area you want to caulk, holding the caulking gun at a 45° angle or any other preferred angle that results in an easier application.
Step 5 – Apply steady pressure on the surface while running the caulking gun along it. This helps you to not squeeze out more caulk than is needed in any given area.
Step 6 – Layer the caulk where the new material meets the old and keep overlapping layers on either side. It likely will only take two thin strips or one thicker one, which will be spread out in a future step.
Step 7 – Ensure the new caulk seam will be wider than the old one so you get a clean, professional look after finishing. This can require some guesswork, so adding a little more caulk than you think is necessary will save you some time later, since a clean-up session is easy.
Step 8 – Ensure the caulk beading will cover both sides and the entire edge of the old caulk for optimal adhesion. It will need to overlap the old caulk some and adhere to the surface that is being caulked.
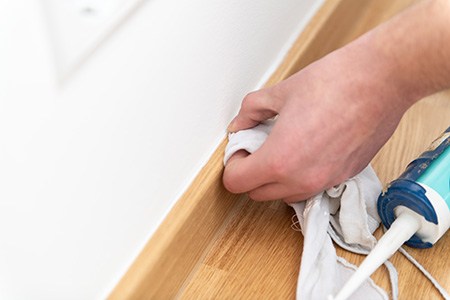
Step 9 – Find a smooth but thick plastic glove like a kitchen glove. Prepare a small mixture (enough to dip your finger in) of water and few drops of dish soap and stir it up. Wear the glove and dip your finger in the diluted dish soap mixture.
Step 10 – Push your finger into the caulk bead to press the material into the old caulk and remove any air. Run your finger along the length of the new caulking bead. You'll find the soapy finger allows smooth movement along the bead without hanging up.
Step 11 – For sealing any seams around a plastic bathtub after painting, for example, use a caulk 'puck' or putty knife for application where required. You can rub some of the soap water on it as well.
Step 12 – For bathtubs, we recommend silicone caulk. For outdoor applications, use polyurethane caulk. Use acrylic caulk for the more general projects like the underside of kitchen cabinets.
When Do You Avoid Caulking Over Old Caulk?
If the old caulk is perished, meaning it looks cracked or peeling, you'll need to remove it. You can't re-caulk over it because it's likely to fail. If that happens, the water will get into the joints and behind the building materials causing rot and mold growth.
If the caulking has mold, it will look like black spots, which is not suitable for re-caulking; you'll have to remove it first. If the base substrate is deteriorated or peeling, you'll need to dig it out and replace it before re-caulking.
FAQ’s Regarding a Second Layer of Caulk
Can you put a second layer of caulk over an existing line of caulk? Yes, but obviously there are details that need to be taken into consideration. Let’s cover all of that now.
Can I Touch-Up a New Caulking Job?
Yes. You can touch up a new caulking job if it dries and you feel there's not enough caulk in the joints to provide adequate waterproofing protection for the building materials. Follow our step-by-step guide in this post to successfully add more caulk to the job.
When Can I Add a Second Layer of Caulk Over Old Caulking?
You can add a second layer of caulk over old caulk that isn't damaged, worn, moldy, or showing signs of failure like peeling and cracking. Follow our step-by-step guide for resealing the area with fresh caulk to protect the building materials.
Can I Apply Silicone Caulk Over Polyurethane Caulk?
We recommend you avoid mixing and matching your caulking materials. Silicone caulking won't stick to polyurethane, and vice versa. If you can; remember which type of caulking you used, it's better to dig it out and redo the job than rather risk it.
What Types of Caulking Do I Use for Which Application?
We recommend using silicone caulking for waterproofing tasks around the bathroom. Use polyurethane for outdoor applications and acrylic caulking for general use around the home.
Can You Caulk Over Caulk? Yes, Following the Procedure Above
Sometimes the existing caulk is in good enough shape but you need to improve the appearance because you're about to sell your home or any other renovation reason. That's fine. It's not "cheating" or whatever someone may be guilting you with. It's totally legit.
You can caulk over caulk and reinforce the previous sealant while making it look much nicer in the meantime. Just make sure you understand what you're doing by reading through the above information and procedure and you'll be done in no time.
You'll Also Enjoy:
- How Much Does a Toilet Weigh? Backed by Statistics
- 12 Types of Shower Heads & Mounting Designs
- 13 Types of Toilet Flanges to Seal & Stop the Leakage
- Plastic or Wood Toilet Seat? The Pros & Cons of Each
- How Long After Shock Can You Swim?
Author: Omar Alonso
 Omar has over twenty years of experience as a professional handyman and electrician, with an emphasis in HVAC, general maintenance and repairs, and interior and exterior construction. He shares this knowledge with us as a writer on these topics. He is also a voracious reader. Omar serves as editor for our editorial team, author, and as a source of endless information for our researchers. Learn more on Omar's author page and all about Worst Room here.


