How To Align Garage Door Sensors in 7 Easy Steps
Author: Omar Alonso | Editor: Omar Alonso
Review & Research: Jen Worst & Chris Miller
Automatic garage door openers are one of modern life’s conveniences. Since 1974, nearly 100 serious incidences with children have occurred with automatic garage doors, so it’s imperative that your safety sensors work right. This is how to align garage door sensors correctly.
Proper alignment and operation of your garage door sensors not only help keep you and your family safe, but they also ensure the door works properly and doesn’t accidentally close on a car or other object. But it’s not always obvious what to do when you suspect you have a sensor issue. Keep reading to learn how to line up garage door sensors.
What Are Garage Door Sensors? How Do They Work?
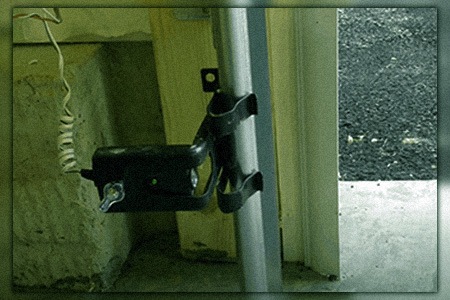
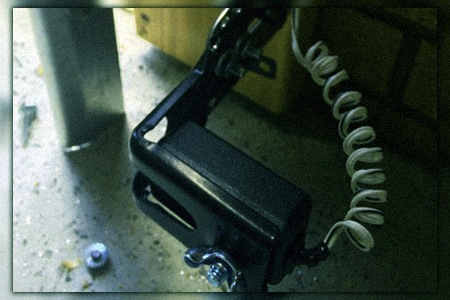
Garage door sensors are an electronic system that ensures the glide path of your door is free of obstructions, so the door doesn’t hit anyone or anything. Typically, technicians mount one sensor on each side of the track, aiming them precisely at one another across the span of the garage door.
These sensors are usually between six and nine inches off the floor, and they have wires running from them to the garage door operator overhead. No matter the types of garage doors, you'll have these sensors in place for safety reasons.
One sensor emits a beam that travels across the open doorway, and the other sensor ‘sees’ that beam and allows the door to close. If a pet, car, person, or other obstacle interrupts the steadiness of the beam, the sensor loses sight of the beam, and the system stops the motion of the door to prevent property damage or injury.
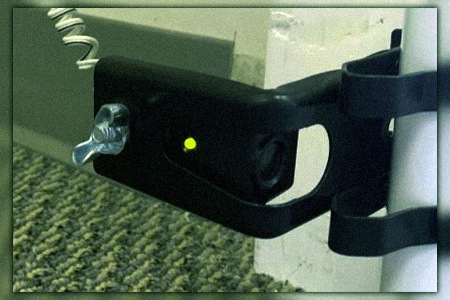
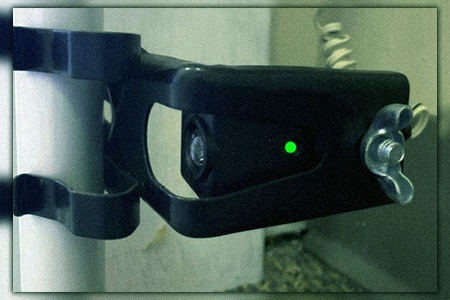
In most cases, the receiving eye has a green light. The sending eye has an orange or red light, making it easy to tell them apart.
Signs You Should Align Your Garage Door Sensors
There are a few signs that may indicate you need to align your garage door sensors, including:
- Your garage door stops and reverses itself when closing
- Your garage door only opens a few inches
- Your garage door operator’s light blinks when you try to close the door
- You can only close the garage door by holding down the button the whole time
These are all signs that something may be wrong with the sensors and you're in for some garage door sensor alignment.
Staying Safe Near Garage Doors
The first thing you should do when you think the sensors aren’t working right is to make sure that your garage door’s travel path is free of obstruction. A single leaf can block the light beam from the sending sensor from reaching the receiver, so look carefully.
Once you’ve ensured that the system is unobstructed, consider your safety. You should never try to bypass the sensors, and if you think there is a problem with the door itself, consider calling in a professional.
Garage doors can be pretty heavy, and their torsion bars or springs can be under significant tension. If you think you’re in over your head, you are! A standard 8' x 7' garage door weighs around 75 pounds and a 16' x 7' door can weight as much as 150 pounds (both before insulation).
How To Align Garage Door Sensors
Follow these steps for perfectly aligned garage door sensors. Follow them order and read all of them once before starting. Then read each step again as you go through the procedure.
Turn Off the Electricity
It might seem like overkill, but shut off the breaker that controls the garage door power. Flipping the switch in your fuse box will prevent the risk of electric shock. Alternatively, if you can, unplug the garage door system from its outlet.
Inspect the Sensors
Before moving anything, look for signs of damage to the sensors. If you see a cracked housing, loose wire, corroded connection, or other indicators something might be broken, make a note.
Wires with their insulation worn down can be a serious problem if you have sweating garage floors or rain that leaks in under the door. You can still try and align the sensors but be prepared that you may have to replace some parts. Deal with any sensor issues like the yellow light or red light problems while you're at it.
Loosen the Screws
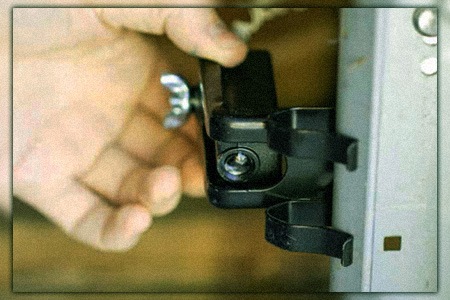
The sensors typically mount to the garage door’s track with a simple clamp. The clamp usually has one or two screws that hold it tightly to the track. Don’t take the screws out. Just loosen them a bit so the clamps stay in place, but you can move them easily.
Level the Sensors
The ideal mounting height is about six inches off the ground. However, not all tracks are the same, so you may have to set them up an inch or two higher. You don’t want them too high, or it’s possible something could go undetected underneath their beam.
Use a measuring tape to ensure that the sensors and clamps are both at the exact same height. Adjust them by sliding the clamps up or down the track as needed.
Use a hand level to ensure that the sensors are completely level. There is typically a bit of play in the sensors, allowing you to aim them precisely. There may even be a wing nut or set screw that will enable you to loosen and tighten the sensors’ attachment to the clamp.
Recheck the Level
Use a string to check the sensor beam’s path. Tie your string around one sensor so that it lines up with the middle of the eye. Stretch the string tightly across the door opening and tie it to the other sensor, keeping it in the center of the eye.
You can use a tape measure to check for height across the span and also use a level to ensure further that the string is level all the way across. Alternatively, if you have one, you can use a laser level and skip the string.
Tighten Your Screws & Recheck the Level
Keep your string or laser level in place. Tighten all the screws you loosened. Double-check for a precise alignment of the sensors, and then remove your string. And that's how to adjust garage door sensors. Now you need to check your work.
Aligning Garage Door Sensors: Check Your Work
Now that you are sure the sensors have perfect alignment and that all the screws are tight turn the power back on or plug the system back in. Press the garage door’s operator button, and watch the door close.
If the door doesn’t close all the way, look for other issues that might affect the operation of your garage door, like:
- Loose tracks
- Wheels that don’t turn right
- Unlubricated points where the door gets stuck on the track
- Adjust the ‘force’ knob on the operator to increase the power of the system
If the door travels smoothly and closes all the way, you have accomplished your mission of how to align garage door sensors.
To ensure the system is safe, place an object, like a basketball or a small box, in the path of the safety beam, and try closing it again. The safety sensors should stop the door and reverse it back to the top.
Remember, if you have a new system, ensure there is one sensor with a green light and one with a red or orange light. If you have two of the same one, the system won’t work, as you need a sending and a receiving unit.
Call a Pro for Garage Door Sensor Alignment
If you haven’t figured things out, check through your owner’s manual. The manufacturer’s troubleshooting steps may help you solve your issue by suggesting a fix.
For instance, if the door is getting stuck on the track and reversing itself, you may be able to repair the issue by using lithium grease to lubricate the system.
FAQ’s Regarding Garage Door Sensor Alignment
Here are some common questions about garage door sensors that always pop up any time this topic enters conversation. All types of garages that have doors that lower from the ceiling have censors, and thus so many of us have encountered them and are curious.
What Do the Green & Orange Lights Mean?
Your garage door sensors have different color lights so that you can differentiate the sending unit from the receiving unit. You need one of each to make the system work.
Why Do I Need to Hold My Garage Door Opener Button?
Holding your garage door button down is usually an override of the safety system. When there is a problem with the sensors or another aspect of the automatic opener, you can visually inspect the area to ensure it’s free of obstructions and hold the button down until the door is closed.
Why is the Light Blinking When I Close the Garage Door?
The garage door opener’s light blinks when there is an issue with the door. A series of blinks after pressing the button to close the door might indicate something is blocking the sensors. Sometimes, the number of blinks corresponds to a particular issue, so use your owner’s manual to troubleshoot.
That's How to Align Garage Door Sensors!
Now you know all about how to align garage door sensors. With only a couple of hand tools, you can ensure that the safety system is working correctly and that your door closes all the way. If you need more help, don’t hesitate to contact a pro today.


