How to Fix Bubbled Drywall Tape & Repair the Paint
Author: Omar Alonso | Editor: Omar Alonso
Review & Research: Jen Worst & Chris Miller
There's nothing as frustrating for a homeowner than to step back to admire your drywalling project, only to notice bubbles in the tape. Fortunately, it's not as challenging a fix as installing the drywall, and you can take care of the issue in less than an hour with the right strategy and tools. Let's look at how to fix bubbled drywall tape, the correct way.
The reality is even professionals have this problem pop up from time to time. While it's not a big issue, you'll need to fix it, or it will ruin the look of your finished project. We put together this guide to help you navigate the problem.
How to Fix Bubbles in Drywall Tape in 7 Steps
You can follow our 7 step process below as a drywall tape bubble fix, but please read through it in its entirety first so that you don’t encounter any surprises as you actually begin.
Remember, drywall tape bubbles due to poor application and bad drywall jobs. It can happen to anyone but the best way to avoid it is to take your time when applying it. If you need any help with drywall tape separating from ceiling seams, we've got you covered, too.
1) Chip Away Any Hardened Drywall
If you spot a bubble and the drywall compound is still wet – good news, you can skip this step. However, in most instances, you'll only notice the bubble after the first layer of joint compound dries or when you go to paint the drywall. This process works for any types of drywall.
Use a small scraper to chip away at the hardened drywall compound. Remove the joint compound until you expose the portion of the bubbled tape. Work away at the problem area until you remove the compound from an inch to either side of the tape.
If you damage some of the bubbled tape in the area, it's not an issue because we'll replace it later. However, ensure you don't interfere with or damage the surrounding area, as that's going to add more work to the job later in the process.
2) Cut Out the Section of Bubbled Drywall Tape
Use your utility knife to cut through the section of bubbled drywall tape on either side. Remove the section you just cut and toss it in the trash; you won't need it again. Make the cuts around an inch to 1.5 inches away from the sides of the bubble.
If you're dealing with several bubbles, remove the entire section instead of cutting out each bubble separately. It's way faster to remove and repair a 2-foot section with three or four bubbles than to attempt to remove each bubble individually.
3) Spread Joint Compound Over the Area
Using your putty knife, spread a thin layer of joint compound over the affected area where you removed the tape. Ensure you fill the seam in the exposed area of drywall and make it flush. If there's a crevice, it makes it harder for the new tape to adhere to the surface, and you might end up with more bubbles. Don't get lazy here, it's critical in how to fix bubbled drywall tape permanently.
If you have to dig deeper to remove it, make the layer of joint compound around ⅛-inch thick for the best results. If it's not flush, you can always build on top of the tape with more joint compound when you finish. Make sure you use joint compound and not spackle for this task.
4) Cut a Piece of Drywall Tape to the Right Length
After filling the area with joint compound, cut a new piece of drywall tape that matches the length of the affected area and cover the seam. The new tape should overlap the existing tape by ½ inch at either end. This approach ensures there are no gaps when you finish.
Don't worry about using a tape measure to calculate the length of tape required; it's fine to do it by gauging how much material you need. Just make sure you have enough of an overlap on the ends.
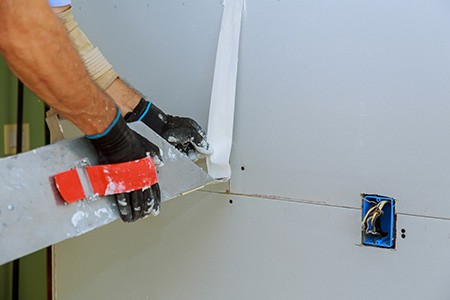
5) Secure the Drywall Tape to the Affected Area
Press the new tape into the gap using one of your hands. With your other hand, use the putty knife to smooth the tape over the joint compound, taking care not to trap any air. Ensure you smooth it out properly and cover the entire area.
It's okay if there are small wrinkles as we'll cover them with joint compound; just avoid leaving any air bubbles. If you have some air trapped behind the tape, use a sharp utility knife to pop the bubble and smoothing it out.
6) Spread the Joint Compound Over the Tape
Dip the putty knife into the joint compound and get a small amount on the tip of the blade. Apply the joint compound over the new tape and smooth it out, ensuring there's no air trapped behind it and the tape. Pull the compound across the tape from one side to the other for the best result with this process.
You should aim to have a thin layer of compound covering the new tape from one side to the other. It's fine if the ends of the tape overlap are visible, as you'll cover them with more joint compound in the next step.
7) Let the Joint Compound Dry
After you finish the repair, wait for 24 hours for the tape to dry and cure. Adding more joint compound while it's wet only increases the risk of more bubbles appearing in the area you just worked on. After it dries, add more joint compound and smooth it out until it's flush with the surrounding area.
Typically, it takes another two to three layers to cover the repaired area completely. Remember to let each coat dry properly before adding another. After it's dry, sand the joints in the drywall and cut away the excess tape. I recommend 120 grit sandpaper for drywall.
Work it to a smooth finish, give it some paint, and you've repaired the problem. The only issue you can encounter is if you're using any fancy modern drywall textures, in which case you'll need to try to build that back up with the compound. But besides that, you now know how to fix bubbled drywall tape.
FAQ's Regarding Fixing Bubbled Drywall Tape
Let’s dig into a few more details that may be leading to questions in your mind as you consider this process.
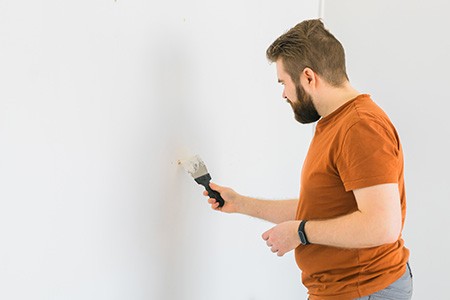
How Do I Fix Bubbled Drywall Tape After I Finish Painting?
In most instances, you will notice the bubbles in the drywall once you go to paint the area. If that's the case, you can use the steps outlined in this article to fix the problem and restore the area.
If you've already painted the site and the bubbles appear, sand down the paint on the affected area before starting the task. After sanding, start chipping away at the old drywall using the guidelines in this post for the best results.
Can I Paint Over Bubbled Drywall Tape?
Don't make the mistake of painting over bubbles in the drywall tape if you can avoid doing so. Flaws like mounds and bubbles in the drywall tape look unsightly and ruin the job. After a few weeks, the imperfections will prey on your mind, and you'll decide to repair the area anyway.
Painting the walls makes bubbles and mounds more visible, and the finished project will look terrible. It will take more time and effort to repair the area, so get it right before you start painting. Once you finish painting, let time pass before sleeping in the room.
Can I Sand Drywall Tape?
Unfortunately, you can't sand down bubbles in the drywall tape. The bubbles form due to air trapped behind the tape. If you sand them down, you'll expose the crevice behind the tape, and you'll need to dig out the compound and start again.
If you sand through the tape, it will reveal the seams, leading to a shoddy job, and you can't cover up the problem with paint. Uncovered seams in the drywall with crack, peel, and leave a horrible finish to your new ceiling or wall.
And if you mean sanding the drywall tape bubble out as opposed to cutting that area of the tape off, that's not a good idea either. You'll be creating a strangely shaped border in the tape, in the shape of the bubble, which is not going to stay adhered well. As we said, when it comes to how to fix bubbled drywall tape, you have to do it right here or you'll just be back later doing it a second time.
What is the Lifespan of Correctly Installed Drywall?
If you do a good job on your drywall installation and there are no bubbles in the tape, you can expect it to last up to 50 years and well beyond in normal interior conditions.
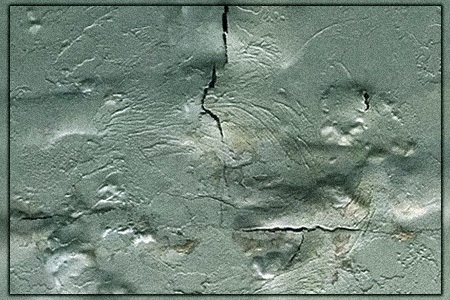
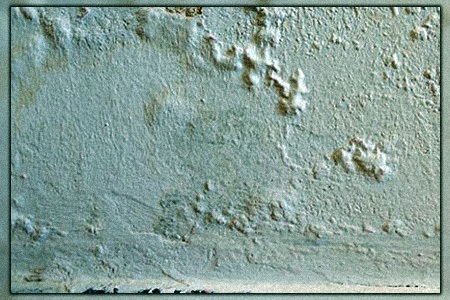
What Causes Drywall to Erode & Deteriorate?
Moisture is the biggest problem causing the deterioration of drywall. Roof and plumbing leaks or flooding will soften the drywall and invite mold growth. If mold starts growing in the drywall, it slowly rots it away.
Will the Drywall Break if I Have to Remove Bubbles From the Tape?
Drywall is tough when it hardens but not impervious and indestructible. Gypsum boards are prone to developing cracks over time, but fortunately, it's easy to repair the surface. If you have to fix your drywall, follow the guidelines in our post to remove bubbles and restore the area to a clean finish before painting it.
Key Takeaways for a Drywall Tape Bubble Fix
Let’s summarize and recap the main points from our procedure above.
- Fixing bubbled drywall tape is easy with the right strategy.
- You need a utility knife, drywall joint compound, a putty knife, and drywall tape to complete the task.
- Chip away the hardened joint compound around the affected area. Ensure you remove at least 1-2 inches of material around the bubbled spot.
- If there are multiple bubbles, remove the entire section of tape rather than trying to fix each independent bubble.
- It's fine if the tape wrinkles; you can cover that up with the joint compound.
- Spread the joint compound over the affected area where you removed the tape.
- Cut a new piece of drywall tape to cover the area.
- Overlap the existing tape at the ends.
- Smooth the tape using the putty knife and add a layer of joint compound, let it dry.
- After drying, apply new layers of joint compound for a flush finish and let it dry.
- Sand down the area and paint it.
- With this guide, you'll manage to fix the area with bubbled drywall tape as well as any contractor. Provided you follow the steps, you won't even notice the repair.
Rest assured with patience and an eye to detail you can solve this issue in a satisfactory manner. You’ll repair the area to the point where no single guest will ever notice, and it’ll be done so well that you’ll soon forget there was ever an issue there, too.
That’s How to Fix Bubbled Drywall Tape
Don’t get overwhelmed. All we’re really doing is cutting away the bubbled portion, smoothing it over with compound, placing a new piece of tape over the affected region, and smoothing it over again with more compound. A little sanding, drying, and some paint is all it takes and it’ll be as good as new. And that’s how to fix bubbled drywall tape. Nice and easy!
You'll Also Enjoy:
- How Much Weight Can Drywall Hold? (6 Factors)
- How Many Coats of Primer on New Drywall?
- How To Remove Drywall Anchors (2 Real Options)
- 13 Types of Drywall Anchors to Hang Any Weight Safely
- 14 Drywall Alternatives That Bring Life to a Dull Room
Author: Omar Alonso
 Omar has over twenty years of experience as a professional handyman and electrician, with an emphasis in HVAC, general maintenance and repairs, and interior and exterior construction. He shares this knowledge with us as a writer on these topics. He is also a voracious reader. Omar serves as editor for our editorial team, author, and as a source of endless information for our researchers. Learn more on Omar's author page and all about Worst Room here.


