What Grit Sandpaper for Drywall? Plus Tools & Tips
Author: Omar Alonso | Editor: Omar Alonso
Review & Research: Jen Worst & Chris Miller

Sandpaper is essential for any drywall project, but can you get away without using it? Is skipping this step a mistake? And if is, what grit sandpaper for drywall is the most appropriate?
This question has been debated by professionals and DIYers alike. The answer is yes—sandpaper should be used on drywall. It offers numerous advantages over not using it, making it the ideal choice during painting projects.
This post examines why utilizing sandpaper on drywall is beneficial, as well as how to utilize it effectively and which types are most suitable for different tasks. With these tips in mind, you can ensure that your next drywall project turns out perfectly with the help of sandpaper.
Types of Sandpaper Available for Drywall Projects
Sandpaper is a great tool for any drywall project. It’s effective for various tasks, like polishing out bumps and blemishes, taking off aged paint or wallpaper, and even giving a unique look. You can't maintain any fancy modern drywall textures, but if you're like most of us with smooth walls, this is a highly suggested preparation stage to engage in.
However, the type of sandpaper needed for a particular project varies. Different types of sandpaper with various grits exist, and it's essential to comprehend the distinctions between them to attain the desired outcome.
Coarse Grit Sandpaper for Heavy-Duty Work
Coarse grit sandpaper has larger particles, making it ideal for heavy-duty jobs such as removing old paint or wallpaper from walls or ceilings. They can also be used to quickly smooth out large imperfections like bumps and divots in drywall before applying new coats of paint or primer.
Let's say you patched a hole after removing a drywall anchor. For these tasks, look for sandpaper with a 40 to 60-grit rating - this will provide enough abrasion without being too aggressive on delicate surfaces like wallboard paper tape joints.
Medium Grit Sandpaper for Smoothing Out Imperfections
Medium-grit sandpaper is perfect for removing minor surface imperfections before painting or priming your walls and ceilings. These typically range from 80 to 120-grit ratings, providing enough abrasion while leaving a relatively smooth finish when you’re done working with them.
Use medium grit sandpaper when you need less roughness than what coarse grades offer and don't want anything too aggressive that might damage the surface underneath your work area's final coat of paint or primer. By the way, do you know how many coats of primer to use on new drywall?
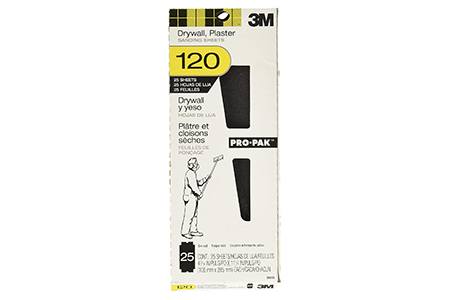
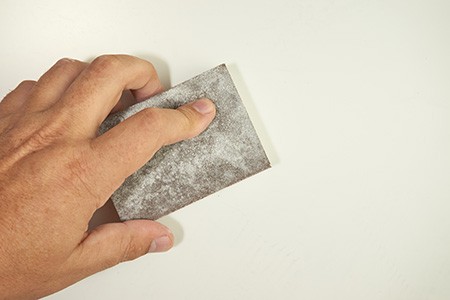
When people ask what grit sandpaper for drywall they should use, they're typically indicating they only want to use one and don't want to start with course and progress down to a fine grit. That can be okay in a lot of instances, and in that case I recommend 120-grit sandpaper for your single go-to grit level. The one pictured above is specifically for drywall pole sanders, which we mention below.
Fine Grit Sandpaper for Final Finishing Touches
Fine-grain sandpaper is designed to provide an ultra-smooth finish after all other preparations on your drywall project's surfaces before painting/priming applications.
Look for sandpaper with 220 to 400-grit ratings that will give you a fine finish that won't require much additional preparation before adding the final coat of paint/primer onto your wall/ceiling areas—perfect if you're looking to achieve professional-level results.
Benefits of Using Sandpaper on Drywall
Sandpaper is an excellent tool for drywall projects, providing various benefits that make using it way better than skipping the step as many are apt to do. From improved aesthetics to increased durability and cost-effectiveness, sandpaper offers superior results compared to other methods and especially over no application at all.
Improved Aesthetics
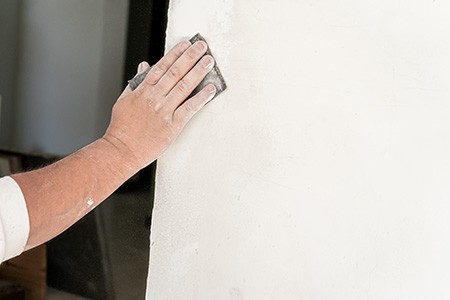
Bad drywall jobs are one thing, as are neutral ones, but high quality jobs really stand out. Sandpaper provides a smooth finish on drywall surfaces, producing a more professional look and feel whether done manually or with electric sanders. The finer the grit size, the smoother the finished surface.
This makes it perfect for creating crisp lines and edges around fixtures such as door frames or window sills. Additionally, its ability to remove minor imperfections gives walls an even appearance that can’t be achieved with any other method.
Increased Durability
Drywall is vulnerable to wear and tear over time due to daily use; however, using sandpaper helps revert the problem by smoothing the wall's surface layer and removing any discoloration, scratches, or stains that accumulate over time.
Its smoothing properties mean that walls stay looking newer for longer when they are treated with sandpaper before painting or wallpaper installation begins.
Cost-Effective Solution
Sandpaper is much cheaper than hiring professionals to do drywall work, which can add up quickly if multiple rooms need attention.
It saves money upfront and long-term since there won’t be any need for costly painting updates down the line when you realize you just can’t stand the fact that you let all of those bumps and other imperfections slide before the first painting.
Overall, utilizing sandpaper during your next drywalling project ensures more professional results while being more cost-effective at the same time—making it a win-win situation all around. You know you’ll be satisfied the first time, and that’s worth the extra time it takes.
How To Use Sandpaper on Drywall
Now that we know what grit sandpaper for drywall is best and why we should use it, we need to talk about how to use it. Before you begin using sandpaper on drywall, it’s important to consider the necessary preparation and safety considerations before beginning.
Safety First
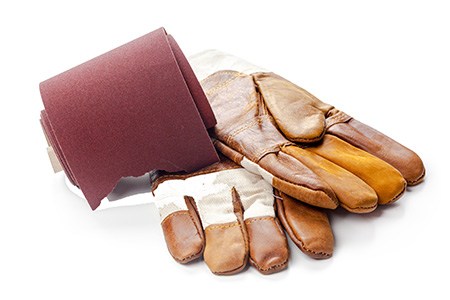
Goggles, dust masks, and gloves should be worn while sanding drywall to protect against airborne particles that can irritate the eyes or lungs. Ensure the area is properly aerated to enable any dust generated during sanding drywall to exit outdoors.
Once you have considered all of these precautions, it’s time to start applying the sandpaper onto your project surface.
Progressive Application
Before you do anything, make sure you seal any cracks forming between sheets of drywall and to fix any bubbles in the drywall tape that have formed over time.
Start with coarse-grit sandpaper for heavy-duty work, such as removing old paint or wallpaper glue residue from walls. Once this has been done you can move onto medium grit sandpaper, which will help smooth out any imperfections in the wall surface caused by previous repairs or damage.
Finally, use fine-grit sandpaper for the final finishing touches, ensuring that your walls look perfect once complete. Clean up any dust by wiping down the walls and baseboards and by vacuuming the area, and then you can proceed on to priming and painting.
It should be said that with some experience and after fixing any obvious damaged spots, you can learn to get away with using only one application of medium grit sandpaper instead of going through all three. This can cut your time spent down to 1/3rd the total during this stage of the prep work.
What Tools Can Be Used to Help?
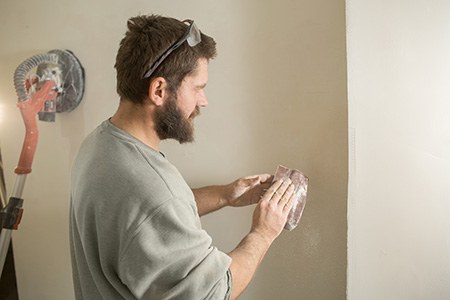
You never want to scrub with sandpaper by hand alone. If you want to use your manual labor, you can wrap the sandpaper around a block of wood. This is called a sanding block and it generates a smooth surface both in front of and behind the sandpaper so you don't accidentally create any valleys in your drywall surface.
There are all types of sanders available that are electric and gyrate and vibrate for you. There are mouse sanders with points that help you reach into corners. There's random orbital sanders and other patterns of movement to ensure a smooth sand. I feel these all may be too strong to use on drywall.
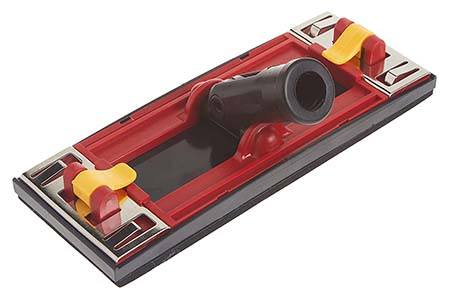
What I recommend when sanding drywall is to use a pole sander (pictured above). There are "drywall sanders" with vacuum attachments and variable speeds so you can dry sand without generating much dust. But honestly, if you don't do this often, I would get a basic pole sander.
A pole sander is essentially like one of those microfiber mops with a flat surface at the end of the pole. But instead of attaching cloth, you'll attach your sheet of sandpaper, and then rub it across the entire surface of the drywall. You can find these in rectangular shapes or circular shapes, but remember you'll need to reach into corners and run along baseboards and crown molding, so rectangular is probably better.
The fact that you'll have so much surface area on the pole to use will provide a much smoother finish, too, as it spreads out the impact and possibility of pushing too hard on any one spot.
FAQs Regarding Drywall & Sandpaper Usage
Do you still have questions about sandpaper and the various types of drywall? Here are some of the most common questions we hear during these conversations to give you a better frame of reference before beginning your work.
What Grit Sandpaper for Drywall is Best if I Only Use One?
Regarding drywall, the best sandpaper grit for drywall is medium grit paper, with a rating of 120. This type of sandpaper will provide an even finish without creating too much dust or damaging the surface. In many cases you can skip the coarse and fine grit sandpaper applications by using a medium option.
Do You Use 120 or 150-grit for Drywall?
It is generally recommended to use 120-grit sandpaper for drywall. This type of sandpaper will provide a smooth finish without leaving deep scratches or gouges on the surface. 150-grit may be used if more smoothing is desired, but it can also leave deeper marks that require additional sanding and touch-up work to correct.
Is 80-grit Sandpaper Good for Drywall?
80-grit sandpaper is not ideal for drywall. It may be employed in some cases, such as when refining a limited patch or mending a split, yet it will result in visible scratches and indentations. It is too coarse for general use across large areas of drywall. For most projects involving drywall, 120 to 150-grit sandpaper should be used instead to achieve the desired finish without leaving marks on the wall.
Do You Sand After Taping Drywall?
Yes, it is recommended to sand after taping drywall to ensure a smooth surface for painting or other finishing. Sanding helps to smooth out any bumps or rough areas left behind by the drywall tape and joint compound or spackle. It is important to achieve a professional-looking finish on your drywall project.
Is Drywall Sanding Better Wet or Dry?
Wet sanding is generally considered better than dry sanding for drywall. This is because dry sanding can create a lot of dust, which can be harmful if inhaled and clog up your sandpaper quickly. On the other hand, wet sanding uses water to reduce dust and can also help create a smoother finish.
To wet sand drywall, you'll want to use a sponge or sanding block that has been soaked in water and then lightly sand the surface. Be sure to keep the surface wet while you're sanding, and rinse out your sponge or sanding block frequently. It is not a must to use a wet method. You can test it and see if you prefer it or not.
What Grit Sandpaper for Drywall? 120-150 Grit in General
Sandpaper is an ideal choice for a wide range of users, from novices to experts, due to its various grades suitable for different jobs and ease of use. With the right tips and tricks, you can ensure your drywall project looks great with minimal effort.
If you're looking for a solution to what grit sandpaper for drywall will provide the best results, look no further. Our experts have provided advice and guidance above born out of real-world experience so that your project is done right the first time.
You'll Also Enjoy:
- Why Drywall Tape Separates From Ceilings & How to Fix It
- 13 Types of Drywall Anchors to Hang Any Weight Safely
- How Much Weight Can Drywall Hold? (6 Factors)
- 14 Types of Wall Paneling to Design Your Decor Style
- Finishing Cornhole Boards for a Smooth Surface
Author: Omar Alonso
 Omar has over twenty years of experience as a professional handyman and electrician, with an emphasis in HVAC, general maintenance and repairs, and interior and exterior construction. He shares this knowledge with us as a writer on these topics. He is also a voracious reader. Omar serves as editor for our editorial team, author, and as a source of endless information for our researchers. Learn more on Omar's author page and all about Worst Room here.


