How to Build a Pallet Adirondack Chair
Author: Omar Alonso | Editor: Omar Alonso
Review & Research: Jen Worst & Chris Miller
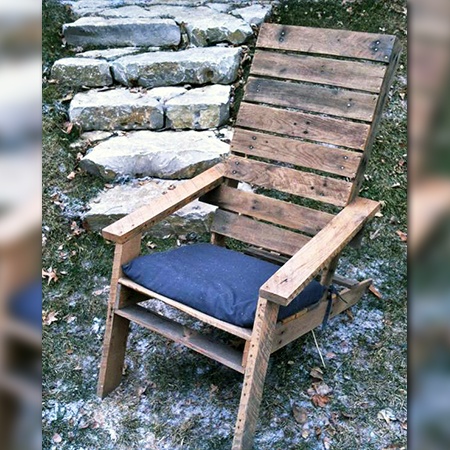
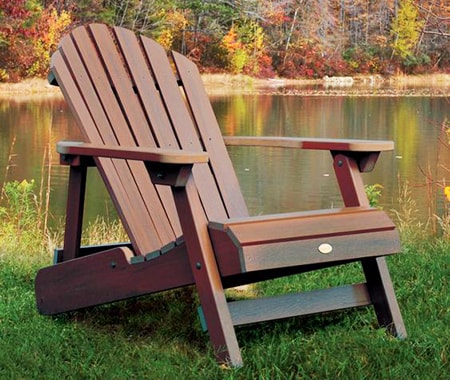
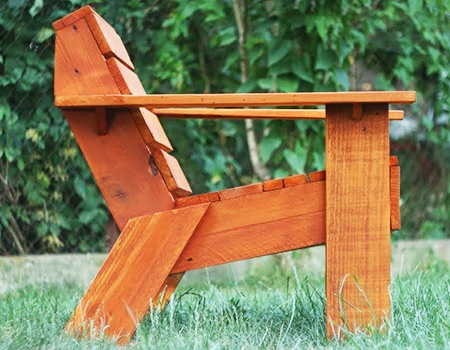
Summer is here, and a pallet adirondack chair screams relaxation. It's the best, most comfortable deck chair ever. Now, what if I tell you directly how to make an adirondack chair out of pallets, which are cheaply and easily obtainable?
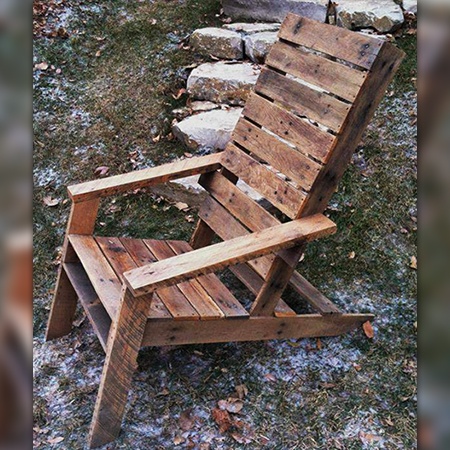
It's an exciting project, and a pallet adirondack chair is a timeless addition to your outdoor furniture. You won't be able to tell the difference from using store-bought wood, except you'll already have an aged and rustic look, which is desirable.
To get you started with this exciting project, here is how to build a pallet adirondack chair out of four common types of pallets in a set of 26 easy to follow steps.
How to Make a DIY Adirondack Chair Out of Pallets
We've broken down our pallet adirondack chair plans into plenty of steps so they're easy to follow and you won't lose your place. It's best to read through them all once before you get started, and then return to step one and begin.

Below we talk about drawing grids over wood in order to cut out the shapes of the parts of the chair. Here's a diagram to describe what we mean. You can adjust any of it to taste and even skip out on a lot of it. We mention all those details below as you come upon them.
1. Things You Need
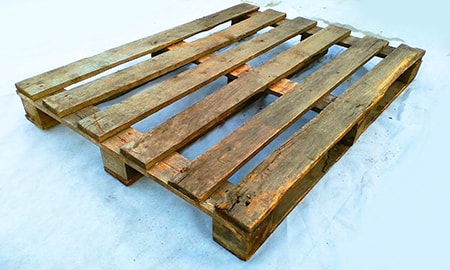
You'll need to have four good pallets, a handsaw, wood glue, screws, crowbar or pry bar, wood putty, a drill, hammer, and 3/8" spade or Forstner bit for the countersink. It also helps to have a jigsaw if you have one, but the handsaw can take care of it. You'll have most of these already, if not all if you're a handyman.
2. Dismantle the Pallets
This is far easier than it sounds to dismantle a pallet. There are many tutorials that you can see over on YouTube. To keep it simple, first, cut off the stringers. Second, to knock off the stringer, use any normal types of hammers or mallets. Third, from the middle stringer, detach the board. That's it you are done.
You can also get dismantled pallets easily. You don't even need technical details here. Use the hammer's claw or crowbar and pry up the wood where it's nailed down with whatever types of nails. Then tap the nails out once they're exposed.
It's that simple. Alternatively you can cut them off while saving as much wood as possible, by cutting closely to where the nails are situated.
3. Demarcate the Seat Stringers

On the side of one of the 1x6 wood pieces measuring 5.5" wide and 35" long, you'll have to draw a grid of one inch by one inch blocks. Now using these 1/2" blocks, draw a smooth pattern to represent the "scoop" where the person's rear will be.
You don't have to do this part. It's adds a ton of time and effort to the project. Plenty of people use flat seats and have no complaints. It's up to you. But after you draw the pattern on one seat stringer, you can wait until you cut it out and use it to trace the exact same pattern on the other one, rather than drawing the grid out twice.
You should pick the best pieces of wood for this part. By best I mean the ones with the least splinters, cracks, water logged parts, etc. The only part you might want to cut out, even if you're going to go with a flat seat, is a curved portion on the front.
This will give your legs a smooth area on the very front of the seat, instead of a sharper edge that push up into your thighs behind your knees and cut off blood flow or become uncomfortable over time.
4. Measure & Mark up the Armrest
Similarly, draw an inch per block grid on a 32" 1x6 piece of wood. The idea is to cut scallops out of the back 2/3rd's of the arm rests so there's more room between them for your body, while having the wider portion be the part your hands would rest on.
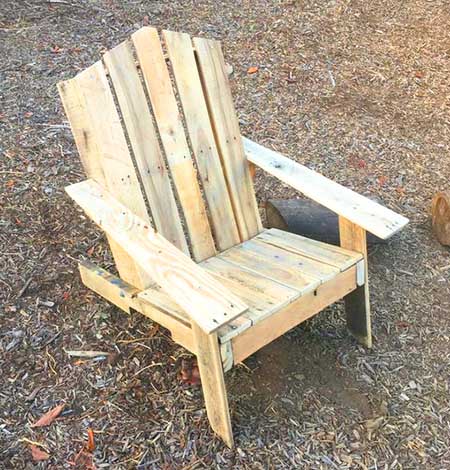
Again, you don't have to do this. It's largely decorative. You can create your own designs or follow the simple designs you see in images on this page. The point of the grid is to provide guidelines as you draw your design so they're smooth and sensible.
5. Demarcate the Bottom Backrest Rail
The lumber used here is just 3.5" wide, so when you draw an inch per block grid atop a 21.5" 1x4 piece of lumber, make sure you don't design your pattern in a way that not enough wood is left over to support your weight at the thinnest part.
You don't have to cut a scallop out of these pieces. That's only if you prefer to have the backrest curved inward to conform to the shape of your back. Plenty of people prefer a flat back. The choice is yours. If you choose to go flat, then don't scoop out the top backrest rail either in the next step.
6. Demarcate the Top Backrest Rail
Repeat the above method of making an inch per block grid, but this time use 22" 1x4 board. When we talk about these length measurements, you'll have to cut them to size. They aren't provided that way by the pallet.
Don't copy the same design to the top rail. You can, but I'd recommend having one scalloped out a bit wider in terms of the circumference of the circle you're drawing. Don't make it any deeper though, for the same reasons as above.
7. Demarcate the Brackets for the Armrests
Cut out two 7.75" long by 2.5" wide boards to act as brackets for the armrests. These will support the outer sides of the armrests where your hands will be situated. It's simply some more structure to spread the weight around.
You can cut a curve into the outer bottom sides for decorative purposes and remove any sharp corners you might scrape a leg on later.
8. Time to Cut Them All Out
Clamp down the stringers properly before using whatever types of saws you have on them. Whatever designs you drew out with your grids, now is the time to cut those out. We're basically talking about concave or convex curves here. Please take extra care when using saw blades of any kind.
9. Measure & Cut Front Seat Slat, Front Crosspiece, & Front Legs
Now you'll need four two 20" by 3.5" boards. This is one for the front seat slat, one for the front crosspiece, and two for the legs themselves. These are simple cuts with no extra designs.
Go ahead and set these aside and label each one in whatever naming convention works for you. That way they don't get lost in the shuffle and you end up with a tape measure trying to find them.
10. Mark & Cut the Rear Crosspiece
For the rear crosspiece, you are going to cut a piece of wood at 18.5" x 3.5" in terms of dimensions. This is the piece that will support the back portion of the seat between the two back legs / back supports.
11. Cut the Back Supports
To make two back supports for your pallet adirondack chair, you'll need to measure 26" and the other side 23", using one of the 1x4 pieces of lumber. Draw a straight line between those two marks if you desire. This will angle the top backrest support in a later step. I'd do it, it won't take long.
Again, you don't have to cut this diagonal piece off, but it removes corners that you may scrape your arm against later and will look more decorative. It's totally up to you on how fancy you want to get with this.
12. Cut for the Seat Slats
You will need nine 1.75" for the seat slats. Simply use a board of 3.5" in width and split from the center, and you will get 1.75". Keep the length at 20". Another way of saying this is to cut five 3.5" boards to 20 inches, then slice them perfectly in half.
Now, just eyeball pilot holes at the end of these pieces and use countersinks to save the wood from getting ruined. Sometimes if you don't use pilot holes and countersinks, you'll split the wood due to too much wood displacement. I'd take the time to perform this part, even if it seems low risk.
These holes are the ones that will let you screw these seat slats down into the two seat stringers you prepared in step 3. Of course, we're not ready to do that yet. We're simply preparing.
13. Mark & Cut for the Back Slats
You will need seven chair slats, and you can use any of your imperfect pieces. These should be just between 34" to 36" in length. You have a choice to make here. You can choose to cut them into tapered shapes or let them be vertically straight.
If you do want to taper them, measure the piece 2.75" wide at the top and 2" at the bottom (thinking about them in a vertical orientation), and cut them using your saw. If you don't care about tapering, you can make them all the same width of below three inches.
When you cut the tapers out, only cut on one side. Don't cut on both sides so they're symmetrical. You do not want them symmetrical. That's a heads up! Also, don't taper the center board at all.
14. Measure & Cut the Fan Tail
This step is optional as well. If you don't mind or prefer a flat surface on top of the backrest, then you can skip this. If you want to cut out a curve for purely decorative purposes, proceed as described below.
Lay down the pieces you cut above for the back slat. Use a board along their bottom edges to get them perfectly aligned. Make sure to line up the larger pieces to the middle and shorter by the edge of the backrest if you have variances in board size.
If you chose to taper these boards, place the thin portions at the bottom so the back fans out to be wider at the top. You may have to flop the boards around until the design fits just right, but it will.
Now, using any types of pencils, mark an arch to the middle from both sides and try to make them symmetrical. Measure it accurately and get both the arches equal. You're drawing the circumference of a really big circle, so you can use a piece of string at the bottom of the board to swing your pencil across in one smooth motion.
After measuring and drawing the arches, mark each board with numbers from left to right so you know which one goes where at the time of the assembly. Now you can cut the fan tail out one board at a time. After assembly you may want to run over the top of them with any types of sanders you have access to in order to make them perfectly smooth.
15. Assembling the Seat Stringers to the Front Legs & Back Supports
We'll begin the assembly by connecting the seat stringer boards to the front legs and the back supports. Lay these boards flat and turn the seat stringer so that the bottom hits around 8.5 inches above the bottom of the front leg. You'll have about 5 inches extending beyond the front leg from this point.
The seat string, tilted downward, will reach down to the bottom of the back support. If you want more of an angle towards the back, you can cut a flat portion off the back bottom corner of the seat stringer so it too can rest on the ground right next to the bottom of the back support.
Between rear back support and a front leg, there should be 21" distance—mark on top and bottom just for assurance. Make the measurements appropriately so that everything lies straight. Use a pencil or chalk. Do this for both sides of the pallet adirondack chair.
Take note that you'll be alternating sides. So the seat stringer should be on the outside of the back support but on the inside of the front legs. That means the back part of the seat will be about 2" wider than the front. This is for decorative purposes and isn't critical.
16. Glue & Screw the Front Legs & Seat Stringers
Now, to attach the front legs, we are going to drill pilot holes and use countersinks. Use the right types of drill bits to achieve this. After making two holes on the top board and only halfway through in the lower ones, you're ready to sink screws in.
Before you do that, spread wood glue between where the two front legs and the seat stringer will meet. Then you can connect the two pieces using an inch long screw. If your screws are too long, you can cut off the parts that stick out and then place wood glue to fill in the hole and cover the remaining part of the screw.
17. Do the Same for the Seat Stringers & Back Supports
To attach the rear back support, we are going to drill pilot holes and use countersinks again. Use a washer, carriage bolt, and nut instead of screws to ensure strength. This is extra simple since the front legs are already attached and the seat stringer meets the bottom of the back support at where the ground will be.
Drill the pilot holes all the way through and then apply glue before pushing the carriage bolt through and tightening down the nut. Go ahead and tighten all the way so the glue quickens correctly. If any squeezes out you can wipe it away with a wet rag.
18. Gather Your Two Back/Seat/Front Leg Combos & the Rear Crosspiece
Now, after assembleing the front leg, seat stringer from before, and the backrest support for both sides of the DIY pallet adirondack chair, line them up side by side. There's nothing between them but orient them so the backs are in the back and the fronts are in the front.
Make sure the seat stringers are on the outside of the back supports and the inside of the front legs, if you chose to do that decorative part. This will make the butt portion a tiny bit wider than the leg portion of the seat.
The two should lay opposite each other like in a mirror image. Now find your rear crosspiece so we can connect these two sides.
19. Attach the Rear Crosspiece Between the Two Sides
Now, to connect the rear crosspiece to the rearmost back support, measure an inch from the bottom of the rearmost back support. The bottom refers to the part that touches the ground. This inch should leave you about another inch on top, too. This keeps the support off the ground to maintain its integrity.
Drill a couple pilot holes and countersinks, then use glue between the side of the rear crosspiece and the flat portion of the back support. Go ahead and attach them, one side at a time. This ensures you have a level chair.
20. Attach the Front Crosspiece

To connect the front crosspiece, you're going to measure and mark from under the seat stringer. The front crosspiece will butt right up against the bottom of the seat stringer while being in the center of the two front legs.
It doesn't have to be perfectly center, but make sure it's the same distance on either leg from the front. This will provide stability and make it more visually appealing.
To recap, the seat stringer will extrude past the front leg by about five inches measuring on the bottom of the seat stringer. Below the seat stringer you'll have the front crosspiece butted right up against it to help support the weight of the seat. The front crosspiece should be about 1.5" back from the front of the front legs, running between them.
21. Attach the Bottom Backrest Rail
In this step, you are going to connect the bottom back rest rail. Place this rail on the seat stringer forward from where the seat stringer meets the back supports. How far forward will depend on how tilted back the back of the pallet adirondack chair will ultimately be.
You can get a feel for it by holding a backrest slat and visually gauge the angle. I'd recommend at least 6 inches if not 8 inches, but not so far forward it sits in the scallops you may have cut out on the seat stringers.
Now use screws to attach it to both seat stringers after putting a strip of wood glue between them. Your chair should be stable enough to stand on its own and be manipulated without fear of it racking itself out of square.
22. Attach the Top Backrest Rail
Now, take your top backrest rail and lay it across the tops of the two back supports. The top backrest rail should overhang both sides if you try to center it. You should be able to measure 2.5" on either side to center it, leaving 18.5" between them.
If your measurements are different, that's fine. Just split the difference and make sure it's centered. If you cut the diagonal out of the top of the back supports, this rail will be tilted backwards but will match the angle of the bottom back support.
After drilling holes on the marked area, place it on the back rest support and attach it using glue and screws. Always glue and screw, because otherwise you'll get creaking sounds.
23. Glue & Screw the Armrest Brackets
In this portion, you're going to attach the brackets of your armrest to the tops of the front legs. On the centerline of the chair’s front leg from the top, make two holes using whatever types of drills you have on hand. Now connect your brackets using screws and glue. Pretty simple!
Keep in mind that the edge on the top of the front leg should be in line with the edge of the brackets. They should form a smooth, flat, T-shaped surface on top so the armrests can lay flat across it all.
24. Attach the Frontmost Seat Slat Between the Seat Stringers
Using screws and glue, a 20" seat board you cut out early on is now going to be placed on the front of the seat. This will connect across to the front of both seat stringers, all the way out to the edges with no overlap.
Remember, use glue and screws, with pilot holes and countersinks first. Countersinks matter the most here so you don't scrape your legs or snag your clothing on screw heads. We're starting with only the frontmost seat board to help provide more stability in the meantime.
25. Connect the Center Back Slat
In this step, you're going to attach the center backrest board. This will begin to create the actual surface your back leans against. For this, on the center of the chair’s bottom and top backrest slat, you'll have to drill a hole on the center back slat (the ones you used to cut the fan tail out of) through to the bottom backrest rail.
Drill a similar pilot hole through to the top backrest rail. You can eyeball the pilot hole at the center of these back slats. Use glue before you screw it in permanently, placing the thinner part at the bottom if you chose to taper the boards, though this center board won't be tapered.
26. Work Your Way To The Outer Edges
We are now going to start the fantail assembly. In this step, you will attach the rest of the pallet adirondack chair’s back pieces. Some people suggest starting with the outer edge back slats but that's asking for a disaster.
The center board should have been labeled #4. Attach #3 and #5, placing the non-tapered edges next to the center board. You can leave about 1/4 to 1/2 an inch of a gap between them. This allows air flow and will keep your back cool as you sit in your future chair.
Once you attach #3 and #5 just like you did the center board, attach #2 and #6, and finally #1 and #7. If you do it right, the tapers will create a natural fanning out of the back so the top is wider than the bottom. Always have the non-tapered, flat side facing towards the center board as you attach them.
27. Attaching the Seat Boards
Before you screw anything down in this step, make sure you do a dry run, fitting each board on their potential spot on the seat stringers. This will give you an idea about the spacing between them you'll need. These spaces offer air flow, like the back does.
Now place all the nine-seat boards you cut out and attach them to the seat stringer by drilling pilot holes and countersinks for the screw heads. Again this is important so you aren't scratching up your butt, legs, or clothes. Don't forget the glue.
Fit all nine seat boards with even spacing over the curve at the front of the seat stringers, back through the scallops (if you chose to cut them out), and on towards the bottom of the back slats. That's all there is to it.
28. The Armrests
Hold the armrests to keep them in place and make three pilot holes in a triangle assembly down through to the armrest brackets and front legs using a drill. This is where the flat T-shape is at the top of the front legs. Glue and screw them down.
Measure up 20" on the back supports from the ground. Try to get the back of the armrests at about that height if you can, and then glue the surface between the armrests and the back supports. Then do your pilot hole and countersink method and screw them in.
29. Use Wood Glue or Putty to Fill in the Holes
Finally, you can use wood putty to fill up any holes you come across. Once that dries I would return and sand the entire chair on every surface to remove splinters and rough spots.
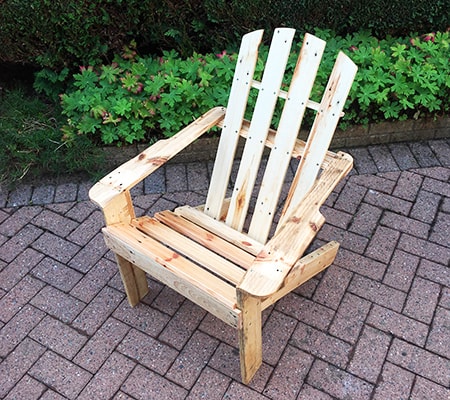
30. Stain & Seal or Paint Your Pallet Adirondack Chair
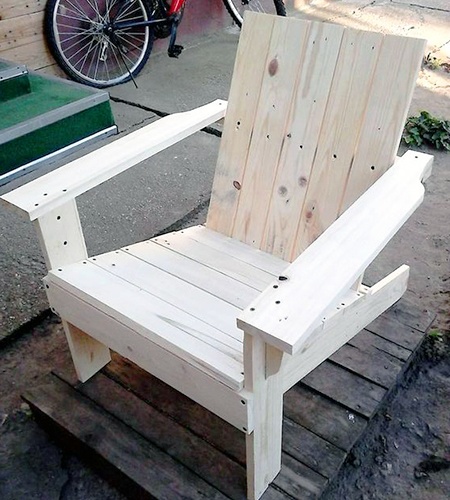
Your DIY pallet adirondack chair is now assembled and sanded! Congratulations. All that's left is to seal the wood. You don't have to worry too much since pallet wood is pressure treated and can be left outside, but you should still seal it.
After that you can choose to either stain the wood, leave it as is, or paint it any color you like. I'd use latex paint as it will resist water a lot better, though it may bubble up over time, in which case you could sand it again and repaint.
Either way, you're done and have an immaculate chair to set on your front porch, back patio, or on your lawn. You can get crafty and create cup holders, attach an umbrella, or anything else you can dream up. Have fun with it! See, adirondack chairs don't have to be so expensive, after all.
Those are our Pallet Adirondack Chair Plans
You are now finally done with your pallet adirondack chair. We do usually recommend sanding the chair as it may get troublesome otherwise with scratches and splinters. At the very least, you can lightly sand down your chair. The chair is ready to be used after the final steps.
Enjoy getting your hands dirty with this project. The result is indeed going to be a comfortable chair that you and your family are going to love sitting in. This wooden pallet adirondack chair is a great addition and is also going to be a great conversation starter.
You'll Also Enjoy:
- How to Make a Cutting Board: It's Not as Hard as You Think
- How to Remove Rust From Tools (Prevention Tips & More)
- How to Store an Extension Ladder in a Garage
- 11 Types of Saws That Make Each Job Easier
- 9 Types of Wrenches That Belong in Everyone's Garage
Author: Omar Alonso
 Omar has over twenty years of experience as a professional handyman and electrician, with an emphasis in HVAC, general maintenance and repairs, and interior and exterior construction. He shares this knowledge with us as a writer on these topics. He is also a voracious reader. Omar serves as editor for our editorial team, author, and as a source of endless information for our researchers. Learn more on Omar's author page and all about Worst Room here.


