Garage Floor Crack Repair 101 (Plus When to DIY & When to Call a Pro)
Author: Omar Alonso | Editor: Omar Alonso
Review & Research: Jen Worst & Chris Miller
No matter how nice your garage floor is when it’s first installed, and regardless of how well you take care of it, you’ll eventually get a garage floor crack that needs repair. The ground around your garage will shift, and the brunt of that will be felt by the floor since your garage doesn’t have a basement or a deeper foundation (in most cases).
Garage floor crack repair is probably easier than you think. Whether you’re just starting your research, or you’re looking to try to justify a surprising estimate you got from a contractor by better understanding what’s involved, you’re in the right place.
To get right to the point, you can absolutely take care of this repair yourself in most cases. If it’s a very serious crack and your garage foundation is significantly shifted and uneven, it may be time to call in an expert, but for smaller cracks or ones that aren’t causing any major issues, it’s a very doable DIY fix and mostly cosmetic.
Once this crack appears, you can be like most people and more or less ignore it, or you can take steps to repair it. The crack will be a gathering-ground for dust and debris, not to mention ice and slush in the wintertime.
Having water and ice get in there isn’t ideal, it can lead to additional damage, especially as the ice expands and puts pressure on it. And you don't want to use temporary sandbag alternatives at your garage door forever. And if we're talking about a cracked basement floor, which is built like a garage floor, then you can be dealing with a leaking basement floor if you find water.
Granted, freezing ice isn’t going to single-handedly or rapidly shift the cement around it, but it’s like death by a thousand papercuts and it’s not even that difficult to repair the crack so that’s what I recommend you do.
I have a feeling we’re already on the same page, since people who aren’t interested in fixing this problem aren’t going to be the people searching for how to repair concrete cracks in garage floors.
Before Fixing Cracks in Your Garage Floor
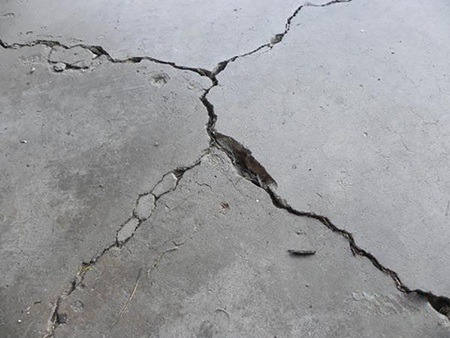
Cracks in the concrete can be very thin and minor, or they can be more than an inch wide and they can span the entire length of your garage. Most of them fall somewhere in between once they start to become noticeable and attract enough attention to have a homeowner looking for solutions.
Sometimes, you’ll fill in the crack and that’s that, like when it’s caused by a one-time shift in the ground around your garage. Othertimes, the crack will continue getting worse and worse until a structural issue is addressed.
In the first example, you fix it and you’re done. In the second example, the fix is more of a band-aid. That’s okay, however, because even if the garage floor continues to crack as more time passes, you’ll still be able to patch it up in the meantime while you decide what to do in the longer-term. If you find yourself dealing with the garage floor sweating, you might notice the chipping happening more rapidly.
When To Call a Professional for Cracks in a Garage Floor
Before we get into specifics on how repair cracks in garage flooring, let’s go over a few examples of when you’ll want to call in a professional for help instead of taking the DIY route.
Getting a professional to fix these types of cracks early can lead to less long-term damage, and the sooner you get it sorted out, the better.
Generally speaking, there are cosmetic cracks and cracks that appear as a sign of structural issues. Cosmetic cracks look bad, but that’s about it - they aren’t a sign of a greater problem. They’re isolated, and once they’re fixed you’re all set.
Structurally-caused cracks, on the other hand, are a warning sign that there’s something more serious that needs to be fixed. Especially if it propagates along the entire length of your standard garage size.
Look for these telltale signs of structural issues:
- When the crack is bulging out of the floor, that’s a sign that the foundation has shifted and contracted a bit, pushing up the bulging area. This is something that a professional can evaluate.
- Erosion of the floor can be another sign that there’s a deeper structural issue.
- When the cement on one side of your crack is lower than the other side of the crack, the crack is likely due to the ground beneath shifting and a structural issue.
Regarding the last sign above, one side below your floor had more “wiggle room” than the other side, and eventually the floor couldn’t support its own weight anymore, and one side cracked then shifted lower.
When this gets really severe, there are companies who can shoot material below the floor to raise-up the part that’s sunk, it’s not cheap but it’s a really good way to fix this type of issue.
Granted, most of this happens very slowly. If you’re in a climate where the temperature varies a lot, for example somewhere with hot, dry summers and cold, freezing winters, this can help amplify and speed up the spread of damage, but even at that, it can take years for it to go from noticeable to bad.
I’m not telling you to just ignore or let it drag on, but understand that you don’t have to call an emergency contractor to come the next day. Shop around, get some quotes, get some opinions, take photos of the crack and compare it a month later, see if it’s getting progressively worse or staying relatively the same. Depending on the types of garages, you can possibly ignore the crack indefinitely if you wish.
How To Fix Cracks In a Garage Floor
Alright, if you’ve decided to tackle this yourself, here’s the best way to do it. We start by cleaning and prepping the area, then we fill it in.
Clean Out The Area of the Crack
Start by cleaning the area where the crack is, and all around it. If there are any loose pebbles or small stones inside of the crack in your concrete, make sure to get them out of the way. The same goes for any concrete alternatives including wood or rammed earth.
A ShopVac will do a good enough job of removing dirt, debris, stones, and whatever else may be in there. A wire brush can also shake loose any pieces that are on the verge of coming off.
The goal is to get any stray pieces out of the crack, and also to knock loose any parts that have crumbled and are about to fall off. Repairing around a crumbling foundation will just ensure that your repair doesn’t last very long, regardless of the types of house foundations you have!
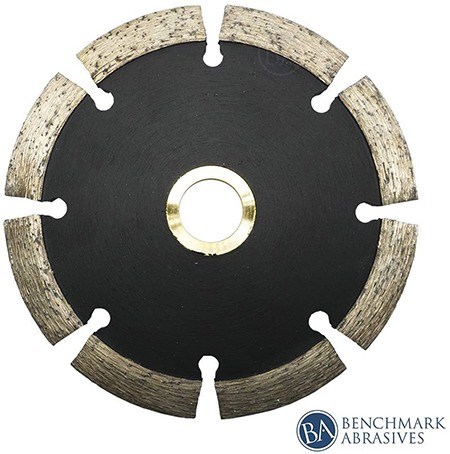
You may also want to consider using a tool called a crack chaser. It’s essentially a type of saw blade that will make the crack more uniform. It’s better for longer cracks. It tidies everything up, and turns a crack that could be tricky to fill into one straighter route.
This makes it easier to fill it in, and helps you get the filler-product into any smaller cracks that may not otherwise accommodate it correctly.
Filling In a Crack In Your Garage Floor
There are two types of filler you can use. For smaller cracks, self-mixing filler is a good choice. For larger and longer cracks, you’ll probably find it more economical and practical to mix the filler yourself.
In any case, there are a number of commercial products available for this and any hardware store will be able to help you out with choosing the best fit for your area. Your local climate is something to keep in mind (how weather-proof does it need to be?).
Epoxy is a common way to fill in larger cracks, and so is a polymerized concrete mix. The polymer acts as a binder, and helps adhere the filler to the rest of the original concrete on your floor.
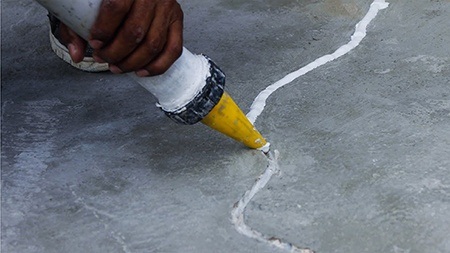
Different products will have their own instructions to follow, but the main thing I recommend time and time again, especially when using epoxies, is to read the entire instruction process before you get started.
These things can take some time to set, they may need special UV lights or sunlight to properly cure, and if you just start on step 1 and make your way down the list, you’re bound to run into at least one or two unexpected hurdles.
Final Thoughts on Garage Floor Crack Repair
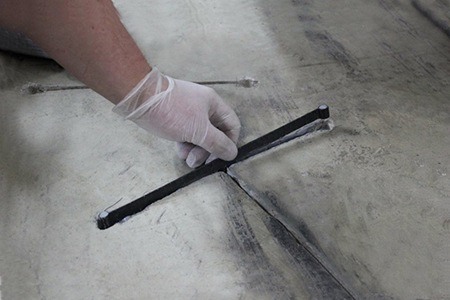
Beyond that, it’s just a matter of mixing the product you choose together, applying it into the crack, smoothing it out, and letting it dry or cure as the case may be.
It’s definitely a project that you can DIY on your own, but again, take precautions to ensure that it’s not a deeper structural issue.
Even if it is, you can make the crack look better in the short-term, but you’ll still want to think about getting things levelled out in the long run because patching up the signs of structural problems can only take you so far.


