The Ultimate DIY Adjustable Standing Desk Build Guide
Author: Rick Worst | Editor: Omar Alonso
Review & Research: Jen Worst & Chris Miller
So, you’ve heard how unhealthy it can be to sit all day long, and you’re thinking about building a DIY adjustable standing desk? There are a few different ways to go about incorporating standing into your work routine.
Whatever your reason for wanting a standing desk is, it can help with your blood flow, your focus, and offers an overall benefit to your health; if for no other reason than it’s less time that you’ll spend sitting. Even adding in an hour or two of standing in an eight or ten hour workday can cause a noticeable improvement.
Some DIY standing desks are fixed in place and their height is non-adjustable, whereas others can convert from a regular sitting desk to a standing desk on the fly.
Getting a ready-to-go standing desk can cost a pretty penny, but you can build your own DIY adjustable standing desk instead. In most cases, the “Do-It-Yourself” aspect just comes down to making your own desktop, rather than building the entire base and mechanisms by hand.
The trick to nailing this DIY project is determining how much of it you would like to do yourself. Do you want to start with the frame and choose your own top for the desk, or build it all from the ground up entirely?
If cost is a factor, it will cost more to build your own top for the desk using gorgeous, high-quality woods than to just pick up something cheap from Ikea or a hardware store, but the DIY option will look incredible.
We’ve broken this project down into sections, and we’ll explore all of the options and decisions you’ll have to make along the way. By the end, you’ll have a really good understanding of which route will be best for you, and you’ll have a solid starting point for how to get it done.
- Step 1 is the planning stage.
- Steps 2 and 3 are the building or assembly stages.
- Step 4 is for the finishing touches.
If you’re unfamiliar how to use the required tools for the options you choose, or how to do the various woodworking techniques discussed below, that is outside the scope of this guide but there are many helpful resources for learning basic woodworking out there, like our article on how to make a cutting board.
It should be noted that you either need access to a workshop with woodworking tools or will have to rent them, find a friend or family member, or pay a shop to make the cuts for you. Sanding is easy enough to do at home, but planing isn't. So if you don't have easy access to tools, consider piecing together a pre-made frame and table top.
Step 1: Planning Your DIY Height Adjustable Desk
Here are the main things to consider when you want to build your own sit stand desk. There are other decisions to make along the way like which materials you want to use, if you’re going to use an existing plan or design your own, and so forth but let’s cover the basics first.
What’s Your Budget?
Some folks opt to go the DIY route because they want to save money, whereas others like to build things themselves because they want something far superior to what’s available in stores and they want something much more customized, regardless of cost.
If you’re looking to spend as little as possible, then you’ll want to think hard about the next question...
Does it Need to be Adjustable?
Are you sure you need this desk to be adjustable? If you’re on a budget, and you really just want to try using a standing desk to see if you like it, you don’t need much more than a few milk crates and an old door to lay across them.
In that case, it’s just a normal desk but taller. You can also use your existing desk, but with a box or something else on top to add some height for the monitor, the keyboard, and the mouse. This is cheaper to test, especially if you want to see if you enjoy walking on under-desk types of treadmills while working or playing video games.
If you can have separate desks for sitting and standing, it saves you the hassle of having to adjust it all the time. But if you’re really going to be switching from sitting to standing at this one work space on a regular basis, it makes sense to choose a design that adjusts very easily. This brings us to our next question…
Turn Crank or Motorized?
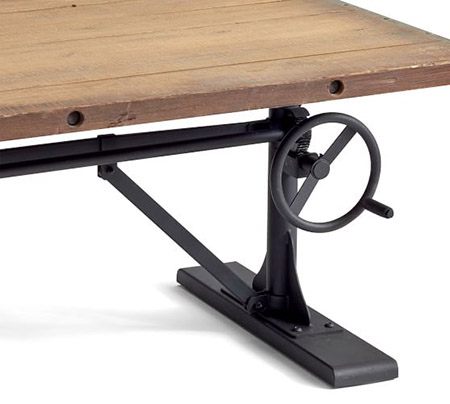
This is just a quality of life thing. The cranks work fine, and it takes 30 seconds or so to adjust. It can save you some money, but is it worth it for what you’ll save? There are pros and cons to both options, but one or the other is a must for a DIY convertible standing desk.
Crank: You don’t need to plug it in or rely on electricity, so it frees up an outlet. There’s no risk of the electrical parts breaking because there aren’t any. Crank-operated standing desks are more affordable and versatile.
The major drawback is that it takes a little longer to adjust, and it takes a little bit of effort. The crank can also get worn out as time passes too, but if you aren’t using it treating it roughly dozens of times per day, it should live a long and useful life.
Motorized: These cost a bit more, and offer a smoother and easier way to raise and lower your diy adjustable standing desk. Some might question how much of a DIY project it really is to just put a tabletop on a motorized base, but again: it just depends on how “do it yourself” you want to be.
Is it only a true DIY project if you forge the metal and shape it into a desk yourself, and solder your own circuit board to control the motor? Of course not.
Some people like to buy the complete desk, others like to buy the bottom of the desk (The legs and the base and the motor/crank that lifts and lowers it all), and to use their own table top. You can use an old door, you can use a piece of glass, a countertop, or you can even make something custom, which I’ll be discussing in step
Materials, Size, & Other Things to Consider
With that out of the way, let’s think about what you want to use in terms of materials, where your desk is going to be situated, and so on.
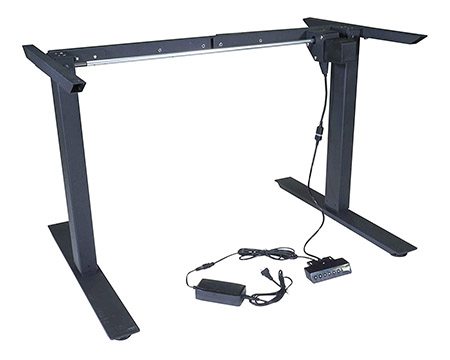
If you pre-purchase the frame, the body of your desk will most likely be made out of sturdy metal. Your desk will be adjustable, and so if you decide that you don’t really like standing to work, you can just keep it lowered and use it as a regular desk.
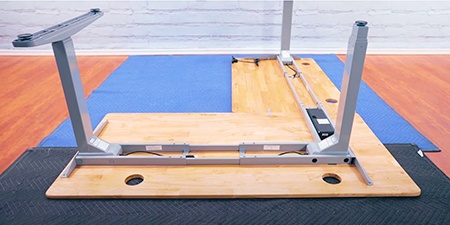
You’ll need to choose a top for the desk, too. Ikea’s standing desk frames have specific tops that fit them, but you can use just about anything as long as it’s the right size. It won’t have the existing holes to attach it to the base, but you can figure something out, especially if the top is heavy. It’s not going anywhere.
Wood is the go-to, but you can also find glass table tops that will work. Make sure it’s meant to be used as a desk, you don’t want to repurpose a window and end up cracking it by accident!
Anything heavy enough will sit right on top of your DIY adjustable desk frame. You could attach a few little sticky rubber nubs to keep things in place, too. If you’re using wood, you can simply attach it with a screw or glue.
Before you pick a frame or begin cutting boards, think about how much room you need on your desk. How much weight can the frame support, if you’re buying one? Are you going to have your tower on the desk, big heavy speakers, multiple monitors, and more? Or just a laptop?
If you don’t need much room, a small standing desk can do the trick, it will only need to be a couple feet wide. If you have a larger setup and you want it all on the desk, you’ll obviously need something a lot larger.
Heads up: Make sure you account for the weight of the desktop you build. It could easily add dozens of pounds, if not more, especially if you’re using thick hardwood. You’ll probably find yourself leaning on your desk sometimes, too, because it can get tiring to stand for long stretches, especially before you’re used to it.
You’ll want to go with a premium base if you plan on building a heavy top for it, and you’ll want to make sure you have at least 50 to 75 lbs of leeway to account for your tower, your monitors, leaning, etc.
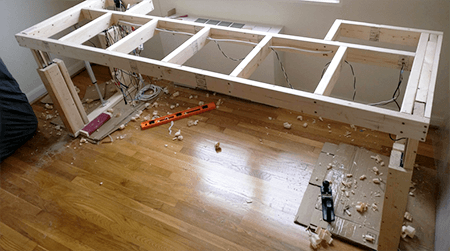
Step 2: Assembling Your DIY Adjustable Desk
If you decide to purchase a pre-made base for your desk, then follow the included instructions on how to assemble it. It should be fairly straightforward, there’s only a handful of parts and they fit together exactly how you’d imagine they would.
That’s all there really is to this step. You get a pre-built base in order to have the crank or motor all set up for you. Otherwise you have to deal with tight tolerances and installations that nobody is really going to want to mess with.
Next, we’re going to look at building one style of top for your desk, but there are plenty of other options and designs out there, too.
Step 3: Building Your DIY Convertible Standing Desk
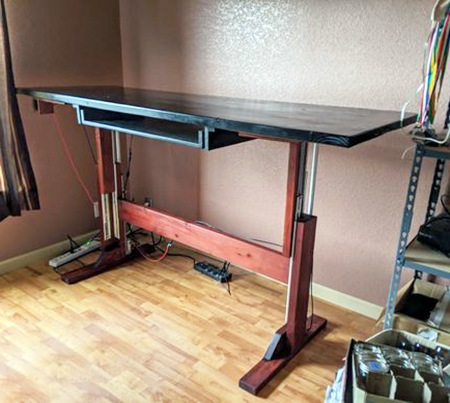
Now that you’ve made your plans and you know exactly what you want, it’s time to build! The process is dead-simple if you’re using a frame and just fitting a board on top. That’s all there is to it.
If you’re building a custom frame and top for your desk, the process is more involved. You can get a piece of plywood or another flat board and use that, or you can get fancy and glue, clamp, and cut oak or another gorgeous type of wood for a luxury feel.
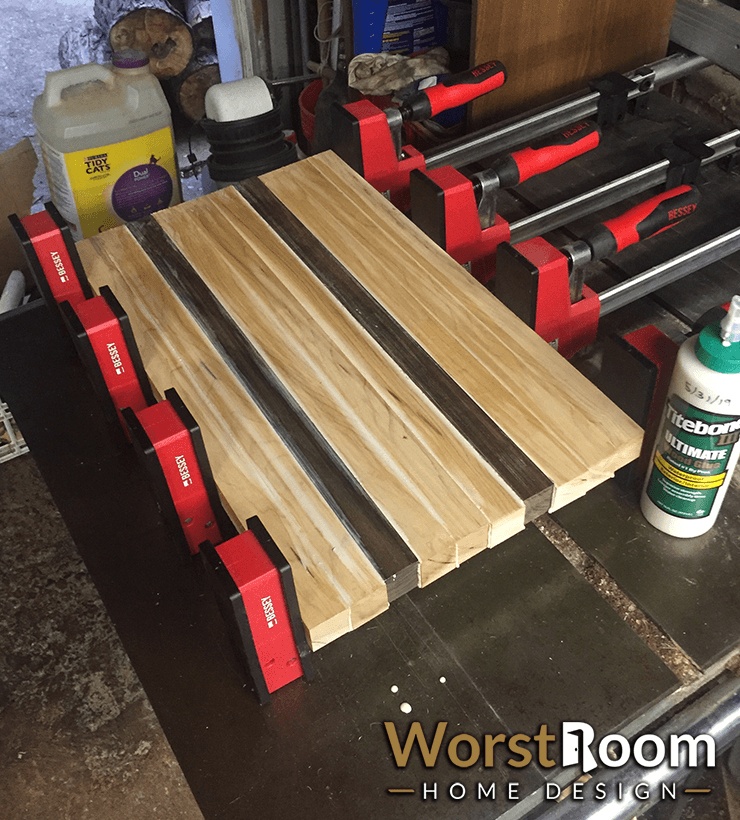
Glue Your Lumber Together
This next step involves lining up boards of lumber and gluing them together, planing and sanding them, and then cutting them to the perfect dimensions. This is the best way to make a beautiful top for your desk that will be sturdy and last a long time, and will look a lot more interesting than plywood or MDF.
It’s a lot more work, but isn’t that what doing this type of DIY project is all about? You’ll end up spending more than a simple desk top would cost, and it’ll take a lot longer, but you’ll have something that’s one-of-a-kind, built to your exact specs, and that will last you forever.
Cutting
After the glue has dried, it’s time to cut the wood to the exact length and size you want. Hopefully, all of this was carefully measured ahead of time.
It’s not a bad idea to cut at both ends to ensure they’re perfectly flat and aligned, even if one of them already looks straight enough.
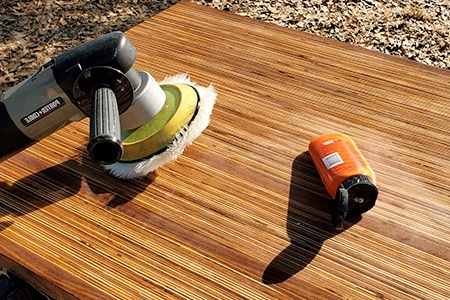
Sanding and Planing
Now, it’s time to plane and sand the surfaces and sides of your tabletop. Take your time with this step, it’s worth using a bunch of different grits and getting a perfectly smooth sand, and planing the top to get it smooth is also crucial for a nice finished product.
You’re going to have things sitting on this table, you’re going to be moving your arms and hands on it, so you’ll feel if anything is sticking out and it will bother you and you will wish you noticed it before staining and mounting your tabletop (take my word for it).
Staining & Seal
Finally, it’s time to paint or stain your lumber. Remember that it’s easier to go darker than to go lighter, so if you are on the fence about what you want, start with something on the lighter side because you can always darken it.
You’ll have to decide if you want to match the current aesthetic of your room and have your desk blend in, or if you want to go with a color or stain that will contrast what’s already in your room.
There are arguments to be made for either style choice, but if you’re putting so much effort into creating this desk, why not have it stand out and act as a focal point of the room?
Step 4: Finishing Touches On Your DIY Adjustable Standing Desk
As you now know, there are so many different ways to go about this project. You can build a tall desk frame that’s static and you can get a kit to make it adjustable.
You could also purchase a frame that has the adjusting mechanism built-in that either cranks or uses a motor (this is what I'd do), and you can go with a pre-built top for your desk.
The most involved method is going premium and making the DIY adjustable standing desk your own to your exact specs. This is a serious amount of work but if done well it can even become an heirloom piece passed down to future generations.
Bonus Step: Enjoying Your DIY Adjustable Standing Desk
Whichever path you take and whether this is a large DIY project or a small one, you’ll get tons of use out of your DIY adjustable standing desk for years to come and you’ll love how much it helps you cruise right past that midday fatigue.
The finishing touches are things like making sure your desk is stable and level, figuring out a cable management system, maybe adding a discreet wireless charger station for your devices, and deciding where you want everything to sit.
If you have speakers on your desk, it’s a good idea to get a foam pad for underneath them to point them towards your ears and to prevent the sound from bouncing off your desk and reducing audio quality.
That just about does it - I can’t wait to see what you come up with with your DIY adjustable standing desk. Email us or hit us up on social media and show us the pictures!
You'll Also Enjoy:
- How to Remove Rust From Tools (Prevention Tips & More)
- Standard Garage Size: Diagrams & Dimensions Up to 4 Car Garages
- 14 Drywall Alternatives That Bring Life to a Dull Room
- 16 Mega Mansions That are Outrageously Nice (& Priced!)
- 31 Fence Ideas for Privacy, Boundaries, & Unique Designs
Author: Rick Worst
 Rick is a home design consultant and enthusiast, whose life is consumed by all things home and garden. His consumption of books, magazines, websites, and TV shows on the topic is extraordinary. Rick serves as founder, author, manager, and web designer for our editorial team and website at large. Learn more on Rick's author page and all about Worst Room here.


