How to End Backsplash on an Open Wall in an Attractive Way
Author: Rick Worst | Editor: Omar Alonso
Review & Research: Jen Worst & Chris Miller

Creating a stunning and functional kitchen requires attention to detail, especially when it comes to the often-overlooked finishing touches like backsplash installation on open walls. But how to end backsplash on an open wall is a mystery that eludes many of us.
A well-executed backsplash design not only adds visual interest but also protects your walls from spills and splatters. However, knowing how and where to end your backsplash on an open wall can be a challenge.
In this blog post, we'll explore various methods for achieving a seamless look while maximizing functionality in your kitchen space.
Understanding Backsplash & Open Wall Endings
To properly end a backsplash on an open wall, it's essential to first understand the different types of backsplashes and why ending them correctly is so important.
Types of Backsplash
Various types of backsplashes serve as both functional and aesthetic elements in kitchens and bathrooms, protecting the wall from moisture while adding a stylish touch to the space. There is a wide variety of materials available for creating your perfect backsplash design.
Ceramic and porcelain tiles are popular choices due to their durability, affordability, and extensive design options.
Natural stone materials such as granite, marble, or travertine provide a luxurious look but may require additional maintenance to preserve their beauty over time. Another innovative choice is metallic tiles made from stainless steel or copper which adds flair and sophistication to your kitchen renovation project.
Other alternative options include wood paneling, vinyl wallpapers or even tempered glass panels for more modern designs.
Importance of Properly Ending Backsplash on Open Walls
Properly ending a backsplash on an open wall is crucial for both the aesthetic and functional aspects of your kitchen design. A well-executed backsplash serves as an essential element in protecting your walls from water damage, which can otherwise result in costly repairs and even health hazards like mold growth.
Not only does meticulous attention to detail ensure that all vulnerable areas are covered, but it also creates a visually appealing look that enhances the overall ambiance of your kitchen space.
For instance, carefully aligning tile patterns or sealing techniques contributes to seamless transitions where the backsplash meets other elements in your interior design.
Methods for Ending Backsplash on Open Walls
Let's look specifically now at how to end backsplash on an open wall. To achieve a seamless look, aligning the tile with base cabinets and extending it to the ceiling is one approach; however, there are other methods for ending backsplash on open walls – read on to discover more.
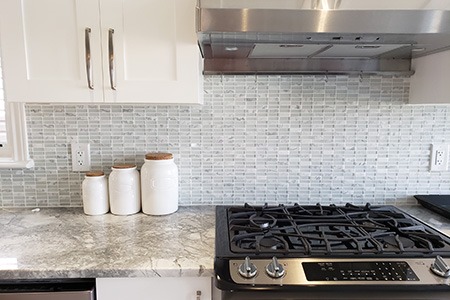
Align With Base Cabinets & Extend to the Ceiling
One popular method for ending a backsplash on an open wall is to align it with the base cabinets and extend it all the way up to the ceiling. This design choice creates visual continuity and adds height to your kitchen, making the space feel larger and more open.
When using this approach, be sure to select a sleek and cohesive pattern for your tile backsplash material that complements both your lower cabinets' color scheme and overall interior decor style.
By doing so, you not only achieve a smooth transition between different surfaces but also enhance your kitchen's aesthetic appeal.
Look for Pre-Existing Vertical Lines on the Wall
Another way to achieve a seamless and professional look when ending backsplash on open walls is to look for pre-existing vertical lines on the wall. These lines can be found in many kitchens, either from existing cabinetry or other design features such as windows or door frames.
For example, if there is a window above your kitchen sink, consider ending the backsplash at the bottom of the window frame to create symmetry and balance within your kitchen design. You can find similar links in a kitchen without windows, such as the side of cabinets, the side of the refrigerator, etc.
This not only elevates the overall aesthetic but helps tie together multiple elements in your space.
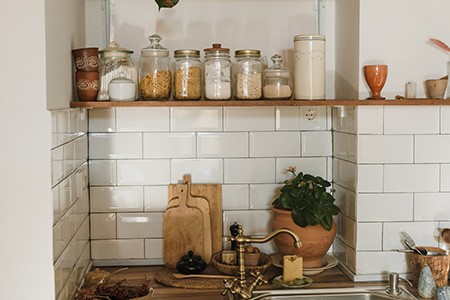
End at Wall Cabinets or the Bottom of a Nearby Window
One of the most popular methods for ending a backsplash on an open wall is to end it at the wall cabinets or the bottom of a nearby window. This approach creates an elegant and polished look that blends in well with other finishing touches in your kitchen design.
Aligning tile backsplashes to upper cabinets is another common trick used by designers to make a kitchen feel more cohesive. It also helps create continuity between different parts of your kitchen, making it appear larger and more spacious.
Create a Custom Border or Trim Piece
Another method for ending backsplash on an open wall is by creating a custom border or trim piece. This option allows homeowners to add a personal touch to their kitchen design and can help elevate the overall look of the space.
Trim pieces also offer flexibility when it comes to ending backsplash on open walls as they can be customized in terms of size and shape. For instance, homeowners with uniquely shaped counters or cabinets may opt for custom-made trim pieces that fit seamlessly into those spaces - resulting in a sleek, professional-looking finish.
Stop at a Natural End-point
One effective answer for how to end backsplash on an open wall is by stopping at a natural end-point. This approach requires some careful planning and consideration of the available space in your kitchen.
Think about where your cabinets end and whether there are any gaps or interruptions that would make for a good stopping point.
For example, if you have upper cabinets that extend all the way to the ceiling, ending your backsplash at the bottom edge of these cabinets can create a smooth transition between materials while also helping to visually frame this part of your kitchen.
Alternatively, if you have a long wall of lower cabinets that ends with a small peninsula or breakfast bar area, finishing off your backsplash at this point can help draw focus to this feature while still providing practical protection against spills and splatters.
Tips for a Seamless & Professional Backsplash Look
To achieve a flawless finish that matches your kitchen style, use the same material and pattern throughout the backsplash design and consider using a bullnose or edge piece to finish the ends. Plan ahead with a dry layout before installation, be meticulous in your measuring and cutting, and pay attention to details like vertical lines on the wall for optimal tile alignment.
Use the Same Material & Pattern Throughout
Using the same material and pattern throughout your backsplash is essential to achieving a cohesive and polished look in your kitchen. This design consistency ensures that your space looks intentional and well thought out.
When selecting materials for your backsplash, consider using solid surface or natural stone finishes to create an elegant appearance.
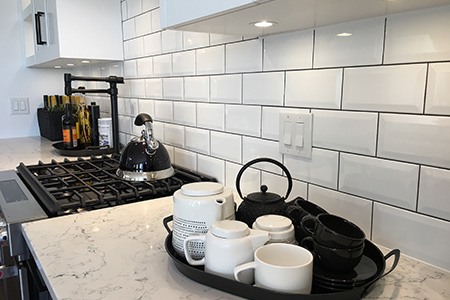
Another way to create consistent design is by using tile patterns in creative ways. You can choose decorative tiles with interesting designs or stick with classic subway tiles for a timeless finish.
Don't be afraid to mix it up either - combining different types of tiles can add depth and visual interest to the space while still maintaining consistency through a common color scheme.
Consider Using a Bullnose or Edge Piece to Finish the Ends

One popular option for ending a backsplash on an open wall is to use a bullnose or edge piece. Bullnose tiles have one rounded edge and three square edges, making them an excellent choice for creating a seamless transition at the end of your backsplash.
Single or double bullnose tiles with rounded edges can blend into the wall's surface, giving the room an elegant and professional finish.
By choosing a bullnose or edge piece to finish off your backsplash, you can create an accent feature in your kitchen design that adds depth and texture while also being practical.
Plan Ahead & Do a Dry Layout Before Installation
To ensure a smooth and efficient installation process for your backsplash, it is crucial to plan ahead and do a dry layout before installation. This step allows you to visualize the design beforehand by laying out the tiles on the wall without any adhesive. How to end backsplash on an open wall needs to be completely visualized first so you're sure you'll like the end result.
With careful measurements and placement, this technique helps to identify any potential issues that may come up during actual installation, such as uneven surfaces or awkward cuts.
Professional tile setter Tim Keefe recommends doing a dry layout by creating a grid pattern on your wall using painter's tape. This will help guide where each tile should go while allowing flexibility in adjusting their position if needed.
Additionally, take note of any outlets or fixtures that may require cuts around them so you can plan accordingly.
Careful Measuring & Cutting
To achieve a flawless and professional-looking backsplash, careful measuring and cutting are essential. Before beginning the installation process, it's important to measure the area where you'll be installing the backsplash accurately.
When it comes to cutting tiles, accuracy is key for a cohesive look. Always double-check your measurements before making any cuts and make sure you have a sharp tile cutter or wet saw on hand for precision cuts.
Remember that taking time with measuring and cutting can save time in the long run by ensuring a smooth installation process without having to redo sections due to incorrect sizing or poor cuts.
Key Takeaways for Where to End Backsplash

- Properly ending a backsplash on an open wall is crucial for both the aesthetic and functional aspects of your kitchen design, as it protects the walls from water damage and enhances overall ambiance.
- There are various methods for achieving a seamless look when ending backsplash on open walls, including aligning with base cabinets or natural end-points, looking for pre-existing vertical lines on the wall, and creating custom borders or trim pieces.
- To achieve a flawless finish, use the same material and pattern throughout the backsplash design, consider using bullnose or edge pieces to finish ends, plan ahead with a dry layout before installation to visualize potential issues early on.
That’s How to End Backsplash on an Open Wall
When it comes to ending your backsplash on an open wall, there are multiple options to consider. From aligning with base or upper cabinets to creating custom borders or trim pieces, finding the right halting point for your tile can enhance the overall flow and design of your kitchen.
To achieve a seamless and professional look, plan ahead, do a dry layout before installation, carefully measure and cut tiles, and use the same materials throughout. With these tips in mind, you can create a beautiful backsplash that complements your kitchen décor while adding functionality and style. That is how to end backsplash on an open wall.
You'll Also Enjoy:
- How to Tile Inside Corners to Get a Pro Pattern Build
- What is Faux Marble? The Pros, Cons, & Affordability
- 12 Alternatives To Shiplap for a Nice Change in Decor
- 14 Granite Cutting Tools for Cleaner & Faster Cuts
- 17 Types of Granite Countertops by Colors & Patterns
Author: Rick Worst
 Rick is a home design consultant and enthusiast, whose life is consumed by all things home and garden. His consumption of books, magazines, websites, and TV shows on the topic is extraordinary. Rick serves as founder, author, manager, and web designer for our editorial team and website at large. Learn more on Rick's author page and all about Worst Room here.


