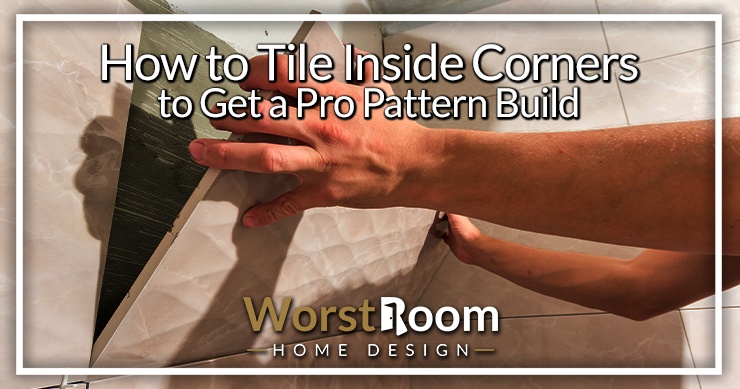
How to Tile Inside Corners to Get a Pro Pattern Build
Author: Omar Alonso | Editor: Omar Alonso
Review & Research: Jen Worst & Chris Miller
Are you renovating your bathroom or kitchen? Tiles provide the best finish for these areas around the home due to the water usage. Tiling is a reasonably easy DIY job. With the right tools and knowledge, you can do a perfect job. But knowing how to tile inside corners can be tricky.
Some tiling techniques are more challenging than others. For instance, tiling inside corners requires a little more attention than other areas. We put together this step-by-step guide to give your project the best results.
Tools & Materials for Tiling an Inside Corner
Once you've decided on the types of tile you'll be installing, you'll need the following materials and tools for the job:
- Tiles & tile adhesive
- Tile spacers
- A tiling trowel
- Tiling grout & sealer
- A rubber grout float
- Sponges & a sponge float
- Tape measure
- Laser level or chalk line
- Marking pencil
- Tile cutter, utility knife, & grinder
- Respirator mask
Make sure you gather these and have them on hand before you begin. Also make sure to read the entire procedure first. Don’t jump into step one without reading through the whole set of steps first! And if you had to bust out your tile removal tools for prep work, make sure your drywall is ready for the next set of tile and your work area is clean.
A Quick PSA for Tiling Inside Corners
You need to decide if you're going to tile into a corner or start there. Most of the time you'll tile the inside corners last after you finish the rest of the project. Start at the center of the wall at the bottom and work your way to the corners. Measure the final gaps and cut your tiles to a snug fit before installing them.
Measure the distance from the corner to the edge of the last tile and mark the tile before you cut, leaving around ¼-inch to provide a good fit. Cut the tile, apply the adhesive or mortar mix, and use it to fill the corner gap. You don't need to grout the corners; use waterproof caulk instead. If you do grout them, look for waterproof grout types and make sure you know how long it takes for grout to dry.
If you're using tile for a kitchen backsplash or around a tub surround, you can start in the corners though, if you prefer not to have partial tiles in the corners and would rather have them terminate at the edge of your cabinets or into the side of a door frame. Use these tips to understand how to end backsplash on an open wall.
You can start in the corners and work your way towards the terminating end of the wall, as long as it's not such a huge surface area that you're going to create a weird pattern by not starting in the center. Less vertically tall horizontal strips are more suitable for starting in the corners.
Top Considerations for Tiling Inside Corners
Take measurements and cut the tiles as you go. This strategy prevents incorrect sizes, and you can compensate for mistakes as you progress through the project.
Cut the tiles outdoors using a grinder, as the dust fills the room quickly. We recommend using a chalk line and marking the level line on the wall for a clean, straight finish. Or you can use a laser level if you have one, though any types of levels can get the job done.
Always wear the correct safety gear to prevent accidents and have a medical kit on hand.
How to Tile Inside Corners in 5 Steps
This guide gives you five steps to successfully tiling inside corners in any room. It's not as challenging a task as you expect if you keep to the directions and use the right tools.
1) Plan the Tile Layout
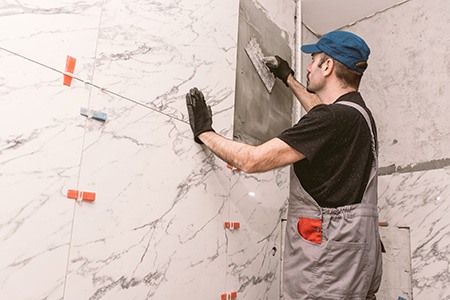
We recommend you always start from the center of the wall and work to the edges of each side to prevent mistakes and achieve a professional finish. This strategy allows the fitting of full tiles to the corners, for a professional finish, instead of having one corner with a thinner tile than the other.
The only cuts are in the last tiles in the corners, giving the job a uniform, neat look. Build each row, or course, on the previous row, and when you can't fit a full tile into the corner, you'll have a gap to fill with your cut tiles.
Keep the height consistent throughout the course using a chalk line or laser level as your guide. Set the second course of tiles on top of the first, and remember to start from the center. For a retro aesthetic, stagger the beginning of each course, and the gaps offset each other, creating a visual effect similar to a brick wall.
Whether using the uniform or staggered method is a personal choice, ensure you use spacers. These spacers maintain the gaps between the tiles providing the course is level for a clean look.
After laying the courses from the floor to the ceiling, you'll work on tiling the inside corners. The results of using this method are the same for all types and sizes of tiles or whether you're using mortar or adhesive for the job.
2) Measuring Corner Gaps
Use a tape measure to take the distance from the edge of the last tile in the course to the corner. Leave around a ¼-inch from the edge of the previous tile to account for the gap in the layout. This approach ensures you have sufficient space to fit the cut tile into the final row in the corner.
Otherwise, you could hold a tile to the wall and mark the correct distance using a pencil. However, we prefer using the tape measure as it offers better accuracy, and accuracy provides a great finish. When you have the correct measurement for the corner gap, mark the tile for cutting.
Whether working with large or small tiles, the best practice is to measure and mark the tile in several places for the best results and to avoid mistakes. For example, if your tiles are 8 x 8 inches and require a 4-inch piece for the gap, lay the tile face down and mark four inches at three spots on the rear. Don't just mark the measurement in two places alone.
Use a straight edge to draw a line through the three markings from one edge of the tile to the other. Don't mark the tile's face; use the back to draw your line. Using the three-marking measurement approach ensures a straight line that doesn't skew to a wider point on one side of the tile to the other.
Remember the adage, "measure twice, cut once." This is especially applies to how to tile inside corners. Precise measurements lead to accurate cuts and a clean, aesthetically-pleasing finish. Measuring the corner gap in the next course may be tempting, but finish the row below before moving on to the next row.
3) Cut the Tiles

Cutting tiles might seem intimidating, but it's not as challenging as you think with the right tool. Cutting vinyl or porcelain tiles only requires a utility knife with a sharp blade for good results. Score the tile along the back and break it apart with our hands.
Heavy marble tiles require a tile cutter, tile saw, or other granite cutting tools. Saws have a hose attachment allowing you to wet the cut line as you progress, removing the dust and heat from the cutting friction to prevent the tile from breaking.
Or you can use a tile cutter or grinder with a masonry cutting disc for the task. We recommend going with the thinner discs for accuracy with the job. However, the tile saw gives the best results and a higher degree of accuracy when working with natural stone or ceramic tiles.
Cut stone and ceramic tiles outside as the dust generated by the job can fill and cloud the room fast, leading to a messy job and more cleanup time. Always wear a respirator to keep the dust out of your lungs.
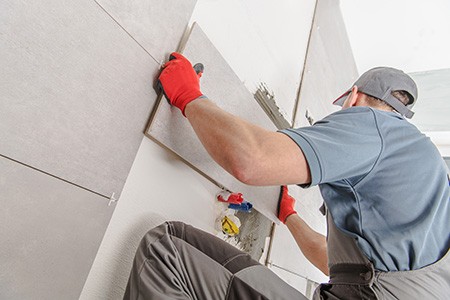
4) Fit Your Tiles to the Inside Corners
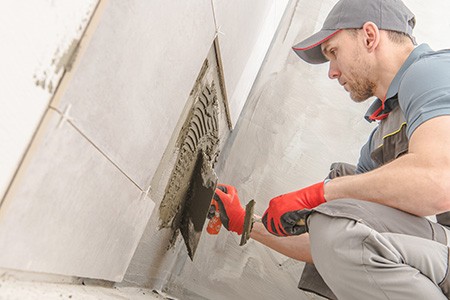
After you finish cutting your tiles, return to the wall and check the fit. Apply the mortar or adhesive to the rear of the tile and press it into the gap. Check the finish to see if it's spaced properly and level to the last tile in the previous course. Place the cut edge to the side of the wall and the clean edge to the last full tile in the row.
5) Caulk the Tiles
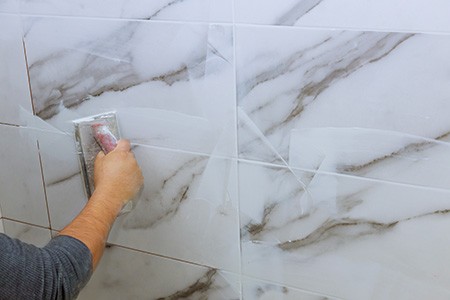
You've done it. You now know how to tile inside corners. After completing the wall, you can move on to the next one. After finishing the corners, you can grout the gaps in the tiles but avoid grouting the corners. We recommend using a waterproof, flexible silicone-based caulk for this task.
The walls of your home flex, creating stress on the tiles. If you grout the corners, the flexion in the wall causes the tiles to lift or crack. They also become prone to collecting moisture, resulting in mold growing under the tiles, presenting a health hazard.
Lay the caulk bead in the corners and give it a few minutes to stabilize. Add a bowl of warm water and a few drops of dish soap; mix well. Wearing a rubber glove, dip your fingers into the liquid and press your finger into the corner, running from the top to the bottom of the bead.
This strategy pushes the caulk deep into the crevice, and the dish soap prevents it from catching on your fingers, giving you a smooth finish. In the future you can caulk over the previous caulk, too, for a fresh new barrier.
FAQs Regarding How to Tile Into a Corner
Whenever corner tiling comes into the discussion, inevitably two questions arise. So let’s deal with those now because a lot of people will be wondering the same.
Do I Overlap the Tile Corners?
Yes. Your tile corners should overlap for the best finish to the tiling job. Don’t try to make the edges meet, just overlap them. You want the tiles as close as possible to ensure the space between them is as small as possible. Leave just enough room to squeeze the tile into the corner. The caulk beading hides and seals the remaining gap.
Do I Start the Tiles in the Corners?
Some tilers like starting the tile patterns in the corners and work their way outward from there. Some tile patterns feature squares or multi-tiled strips on the panel, allowing you to start from the far corner of the room, giving a more consistent look to the flooring. Start from the corner farthest away from the door.
Other tile patterns may require you to tile the perimeter, working towards the center of the room to complete the design. However, tiling the walls requires a different strategy, and you'll start from the center of the wall at the bottom. You might have to cut a few more tiles, but the result looks far more professional.
And That's How to Tile an Inside Corner Like a Pro
This procedure is only scary or concerning the first time because you've never done it, so you have a lot of little questions or you worry that you're missing something obvious. If I could boil it down to the most simple explanation, it'd be like this: Start tiling in the corners, overlap the tiles in the corner, and work your way outward. That's it! And now you do know how to tile inside corners and can proceed with confidence.
You'll Also Enjoy:
- 14 Shower Tile Alternatives to Reinvent Your Bathroom
- Can You Paint Bathroom Tile? Cheaply & Easily!
- 15 Modern Drywall Texture Types: Contemporary Finishes
- 21 Pebble Shower Floor Pros & Cons to Consider
- What is Faux Marble? The Pros, Cons, & Affordability
Author: Omar Alonso
 Omar has over twenty years of experience as a professional handyman and electrician, with an emphasis in HVAC, general maintenance and repairs, and interior and exterior construction. He shares this knowledge with us as a writer on these topics. He is also a voracious reader. Omar serves as editor for our editorial team, author, and as a source of endless information for our researchers. Learn more on Omar's author page and all about Worst Room here.


