How to Fix a Leaking P-Trap (Easiest Repair Ever)
Author: Omar Alonso | Editor: Omar Alonso
Review & Research: Jen Worst & Chris Miller
Is there water leaking from the kitchen cabinets under the sink? How annoying! You could be dealing with a leaky P-trap. It's a frustrating experience to get a leak, and it doesn't smell great, either. Fortunately, we have a few strategies to help you solve the problem. This is how to fix a leaking P-trap (and it's real easy).
P-Traps Explained
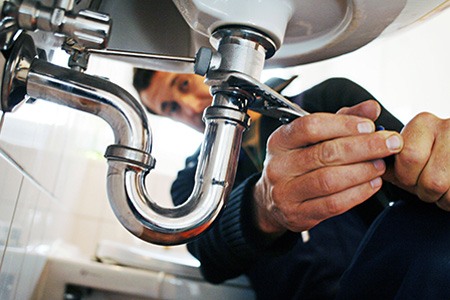
The P-trap is an important piece of plumbing in the home with an important purpose. If you look under the sink, you'll see a U-shaped piece, which is the P-trap. The P-trap collects water, leaving a level that prevents sewer gas from rising into your home; that's why it's not a straight pipe.
Without the P-trap, gas, and pathogens could find their way into your residence, causing illness and lowering your quality of life. The P-trap also catches debris entering the plumbing, preventing clogs in the system.
While the P-trap takes more of a "U" shape from the side, it resembles a "P" from the top view, hence its name. If the P-trap starts leaking, the water runs out all over the surface below it. You might also notice the sewer gases creating a smell around the area.
What Are the Common Causes of P-Trap Leaks?
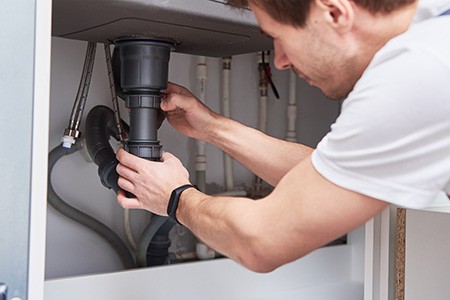
The P-trap features construction with plastic, rubber, or brass. They're available in various sizes, the most common being 1 ¼" and 1 ½".
The most common cause of leaks in the P-trap is a loose lower connection in the joint. The P-trap connects to the vent stack and the drain line, and those connections may come loose over time due to perished material, improper installation, or movement in the joint.
Debris building up in the P-trap may cause a blockage, leading to a leak. You can use a plunger or plumbing snake to clear blockages in the P-trap; however, if it's split, you'll have to replace it.
How Do I Know if the P-Trap is Leaking?
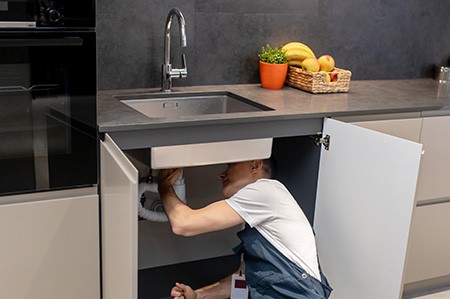
If you notice water on the floor under the sink in the kitchen or bathroom and a foul stench in the room, the likely cause is a leaky P-trap. All types of bathroom sinks, kitchen or laundry sinks, and all sinks in general have a P-trap. The leaking water may dry between uses, but you'll see water stains around the sink's base or if you open the cupboards under the sink.
Turn on the faucet and wrap your fingers around the top and bottom joints to check if the P-trap leaks. If you feel the water, then you know it's leaking. If there's a blockage in the P-trap, the water starts backing up into the sink.
Usually you'll find the P-trap is leaking at the threads. This is because a washer has degraded, putty has been displaced, the old teflon tape is worn out, or even more common that the nut has simply become loose.
If you have handy skills, you can replace the P-trap yourself. However, if you have no experience working with plumbing or tools, you must call a plumber to replace it. Sometimes, it is a loose connection causing a problem, and tightening the clamp stops the leaks. However, if there's a split in the pipe, you'll have no option but to replace it.
A P-trap is a relatively inexpensive fitting and doesn't take long to replace. However, if you have to hire a plumber, you could be looking at a minimum $100 to $150 call-out fee for the work if not more, even if it only takes them a few minutes to replace.
Make sure you're dealing with a leaking P-trap and not a leaking flexible hose under your sink that's dripping onto the trap and making it appear to be leaking.
How to Fix a Leaking P-Trap

If you feel like tackling the job of replacing the P-trap yourself, here's a step-by-step guide to the process.
1) Find the Leak
First, you'll have to use the method we described earlier to source the leak. Wrap your fingers around the top and bottom connection and turn on the faucet. If you feel the water, on the top or bottom, you know that's the source of the problem. Check the sides of the P-trap; the moldings may have split, causing the leak.
2) Tighten Connections
If you feel the water on the top or bottom of the P-trap where it connects the plumbing, try tightening the connections. Tighten the nut on the clamp using a screwdriver or wrench, depending on the type of fitting you have secured the clamp to the P-trap. Ensure the clamp and nut are straight when tightening.
3) Replace the Washer
If the P-trap continues to leak, try replacing the washer. Remove the nut and washer and take them with you to the hardware store to source a replacement. An associate of the store can find the perfect match replacement for you.
- Unscrew the nut securing the P-trap to your drainpipe
- Remove the washer and replace it
- Fasten the nut and turn on the faucet to test for leaks
This is a very simple process. Don't be afraid to do it yourself.
4) Buy a Replacement Kit
If you still have no joy from your fixes and the leak continues, consider buying a new P-trap. Confirm your need for a new P-trap by collecting dripping water, indicating the need to replace the unit.
They come in sets and are readily available for your local plumbing or hardware store. Remove the old P-trap using the abovementioned steps, and fit the new set. Ensure you fit it correctly, or it will leak. It's essential to replace the P-trap as soon as possible to prevent further water damage and stop mold from growing in the area.
The sizing should be universal for the most part but carry the actual P-trap, nuts, washers, and any other parts with you to the store so you can confirm you're getting the right size.
What Tools Do I Need to Fix a Leaking P-Trap?

Knowing how to fix a leaking P-trap is half the battle. Replacing a broken, cracked, or leaky P-trap isn't rocket science, but you need to have the tools to do it. Most homeowners can handle the task with handy skills and a few tools. Many modern, plastic P-traps are designed to be replaced with no tools, but it's still better to have some on hand in case things have gotten a little stuck.
Drain Clearing - If the P-trap is clogged, use a plunger (carefully), snake, or a drain cleaner to try and clear the blockage. You can even unclog a drain with salt if you're patient.
Wrench for Removal - If you have to remove the P-trap, you'll need a wrench to loosen the nuts on the clamp.
Putty or Teflon Tape - Many P-traps have putty around the connections. You'll need a putty knife to remove the old putty and apply new putty after replacing or securing the old one. On newer plastic ones, the washers do the job but it's always a good idea to add some teflon tape around the pipe threads.
Replacement P-Trap - If you're replacing the P-trap, you'll need a new P-trap set. Most sets include a new washer, but that's not always the case. Ask the attendant at the plumbing store if the kit has the washer included if you can't see it.
Shop Rags - You'll also need an old cloth or rag to wipe away the excess putty after installing your new P-trap or securing the old one in place after repairs.
If the drainpipes are leaking, the job becomes more intensive. You'll need a hacksaw to remove the old pipework, fitting to connect new pipes, and glue to secure the new pipes. While you're under the sink, consider if you need to open the water valves more if you have low water pressure in your sink.
Preventative Strategies to Avoid P-Trap Leaks
Poor installation is one of the most common causes of a leaking P-trap. So, you'll need to properly fit the new P-trap when replacing it, or the leak will return. P-traps come in different sizes, so ensure you get the right model to match your plumbing.
We recommend removing the old P-trap and taking it with you to the plumbing or hardware store to ensure you get the correct size for your replacement.
Install the P-trap to the correct specifications. If you have no idea how to do it, check YouTube for a video. There are likely hundreds of informational videos on the platform that show you how to remove and replace the P-trap.
It should be obvious to you once you remove the previous one, though. You unscrew the two nuts and they slide back out of the way so you can pull the P-trap away from the piping. Then you simply slot the new one back in and re-screw the new nuts into place. And just like that, you're done.
Ensure you seal the P-trap correctly after installation. If you don't use enough putty, teflon tape, or allow the washers to be misaligned, the water leaks around the joint, causing the issue.
Remove blockages in the P-trap as soon as you detect them. Leaving the blockage to worsen places the P-trap at risk of leaking. Keep a plunger in the home or a plumbing snake to help you remove blockages when they occur.
Where Can I Buy a New P-trap?
P-traps are common plumbing items; you'll find them at the local hardware or plumbing store. They usually come in sets, including the P-trap, the washer, and the clamps required to secure it to the pipework. However, most kits don't come with putty, so you'll need to buy that separately.
You'll also need the basic tools required to complete the job. Typically, a P-trap replacement kit is affordable, and you can pick one up for around $5 to $10 for plastic versions and up to $130 for a brass P-trap kit.
Do I Need to Hire a Plumber to Install My New P-Trap?
If you don't have any handy skills and you've never worked with tools before, you have no option but to call a plumber who knows how to fix a leaking p-trap. Ensure you hire a reputable plumbing business, or you'll end up with a shoddy installation, and the P-trap will start leaking in a few months.
Ensure the plumber gives you a warranty on their work. You'll pay probably 20x the cost of the plastic P-trap in labor. Let me assure you again that this is a very simple repair that you can handle if you break through the fear of having never done it before.
Key Takeaways for How to Fix Leaking P-Trap
Let's revisit the main points that we've learned about thus far:
- The P-trap sits under the sink, connecting to the pipework.
- The P-trap stops sewer gases from entering your home, which may cause a health hazard.
- P-traps usually leak at the connections, so check those first.
- If the connections are loose, tighten them and see if it stops the leak.
- If the leak remains, remove the P-trap and check the washer.
- If the washer has perished, you'll have to replace the P-trap.
- You can replace the P-trap yourself if you have handy skills and the right tools for the job.
- If you don't have any plumbing or DIY skills, call a competent and reputable plumber to handle the replacement.
- Ensure you get a guarantee on the plumber's work.
Tightening or replacing a P-trap is the most beginner level plumbing fix you could possibly be confronted with. Be brave and give it a try!
That's How to Stop a P-Trap From Leaking
You should now be completely familiar with what a P-trap looks like, why they end up leaking, and how to secure them to stop the dripping, or diagnosing a deeper problem. You should understand how to take the parts with you to the hardware store to purchase a replacement and how to actually replace it. From start to finish, that's how to fix a leaking P-trap, and it's a project you can do all on your own.
You'll Also Enjoy:
- The Different Types of PEX Pipe for Each Application
- How to Insulate PEX Pipe Effectively for All Seasons
- How to Fix a Running Toilet Without a Ball Float
- 28 Kitchen Sink Ideas to Impress While Best Utilizing Your Space
- Can You Put Drano in the Dishwasher? No & Why
Author: Omar Alonso
 Omar has over twenty years of experience as a professional handyman and electrician, with an emphasis in HVAC, general maintenance and repairs, and interior and exterior construction. He shares this knowledge with us as a writer on these topics. He is also a voracious reader. Omar serves as editor for our editorial team, author, and as a source of endless information for our researchers. Learn more on Omar's author page and all about Worst Room here.


